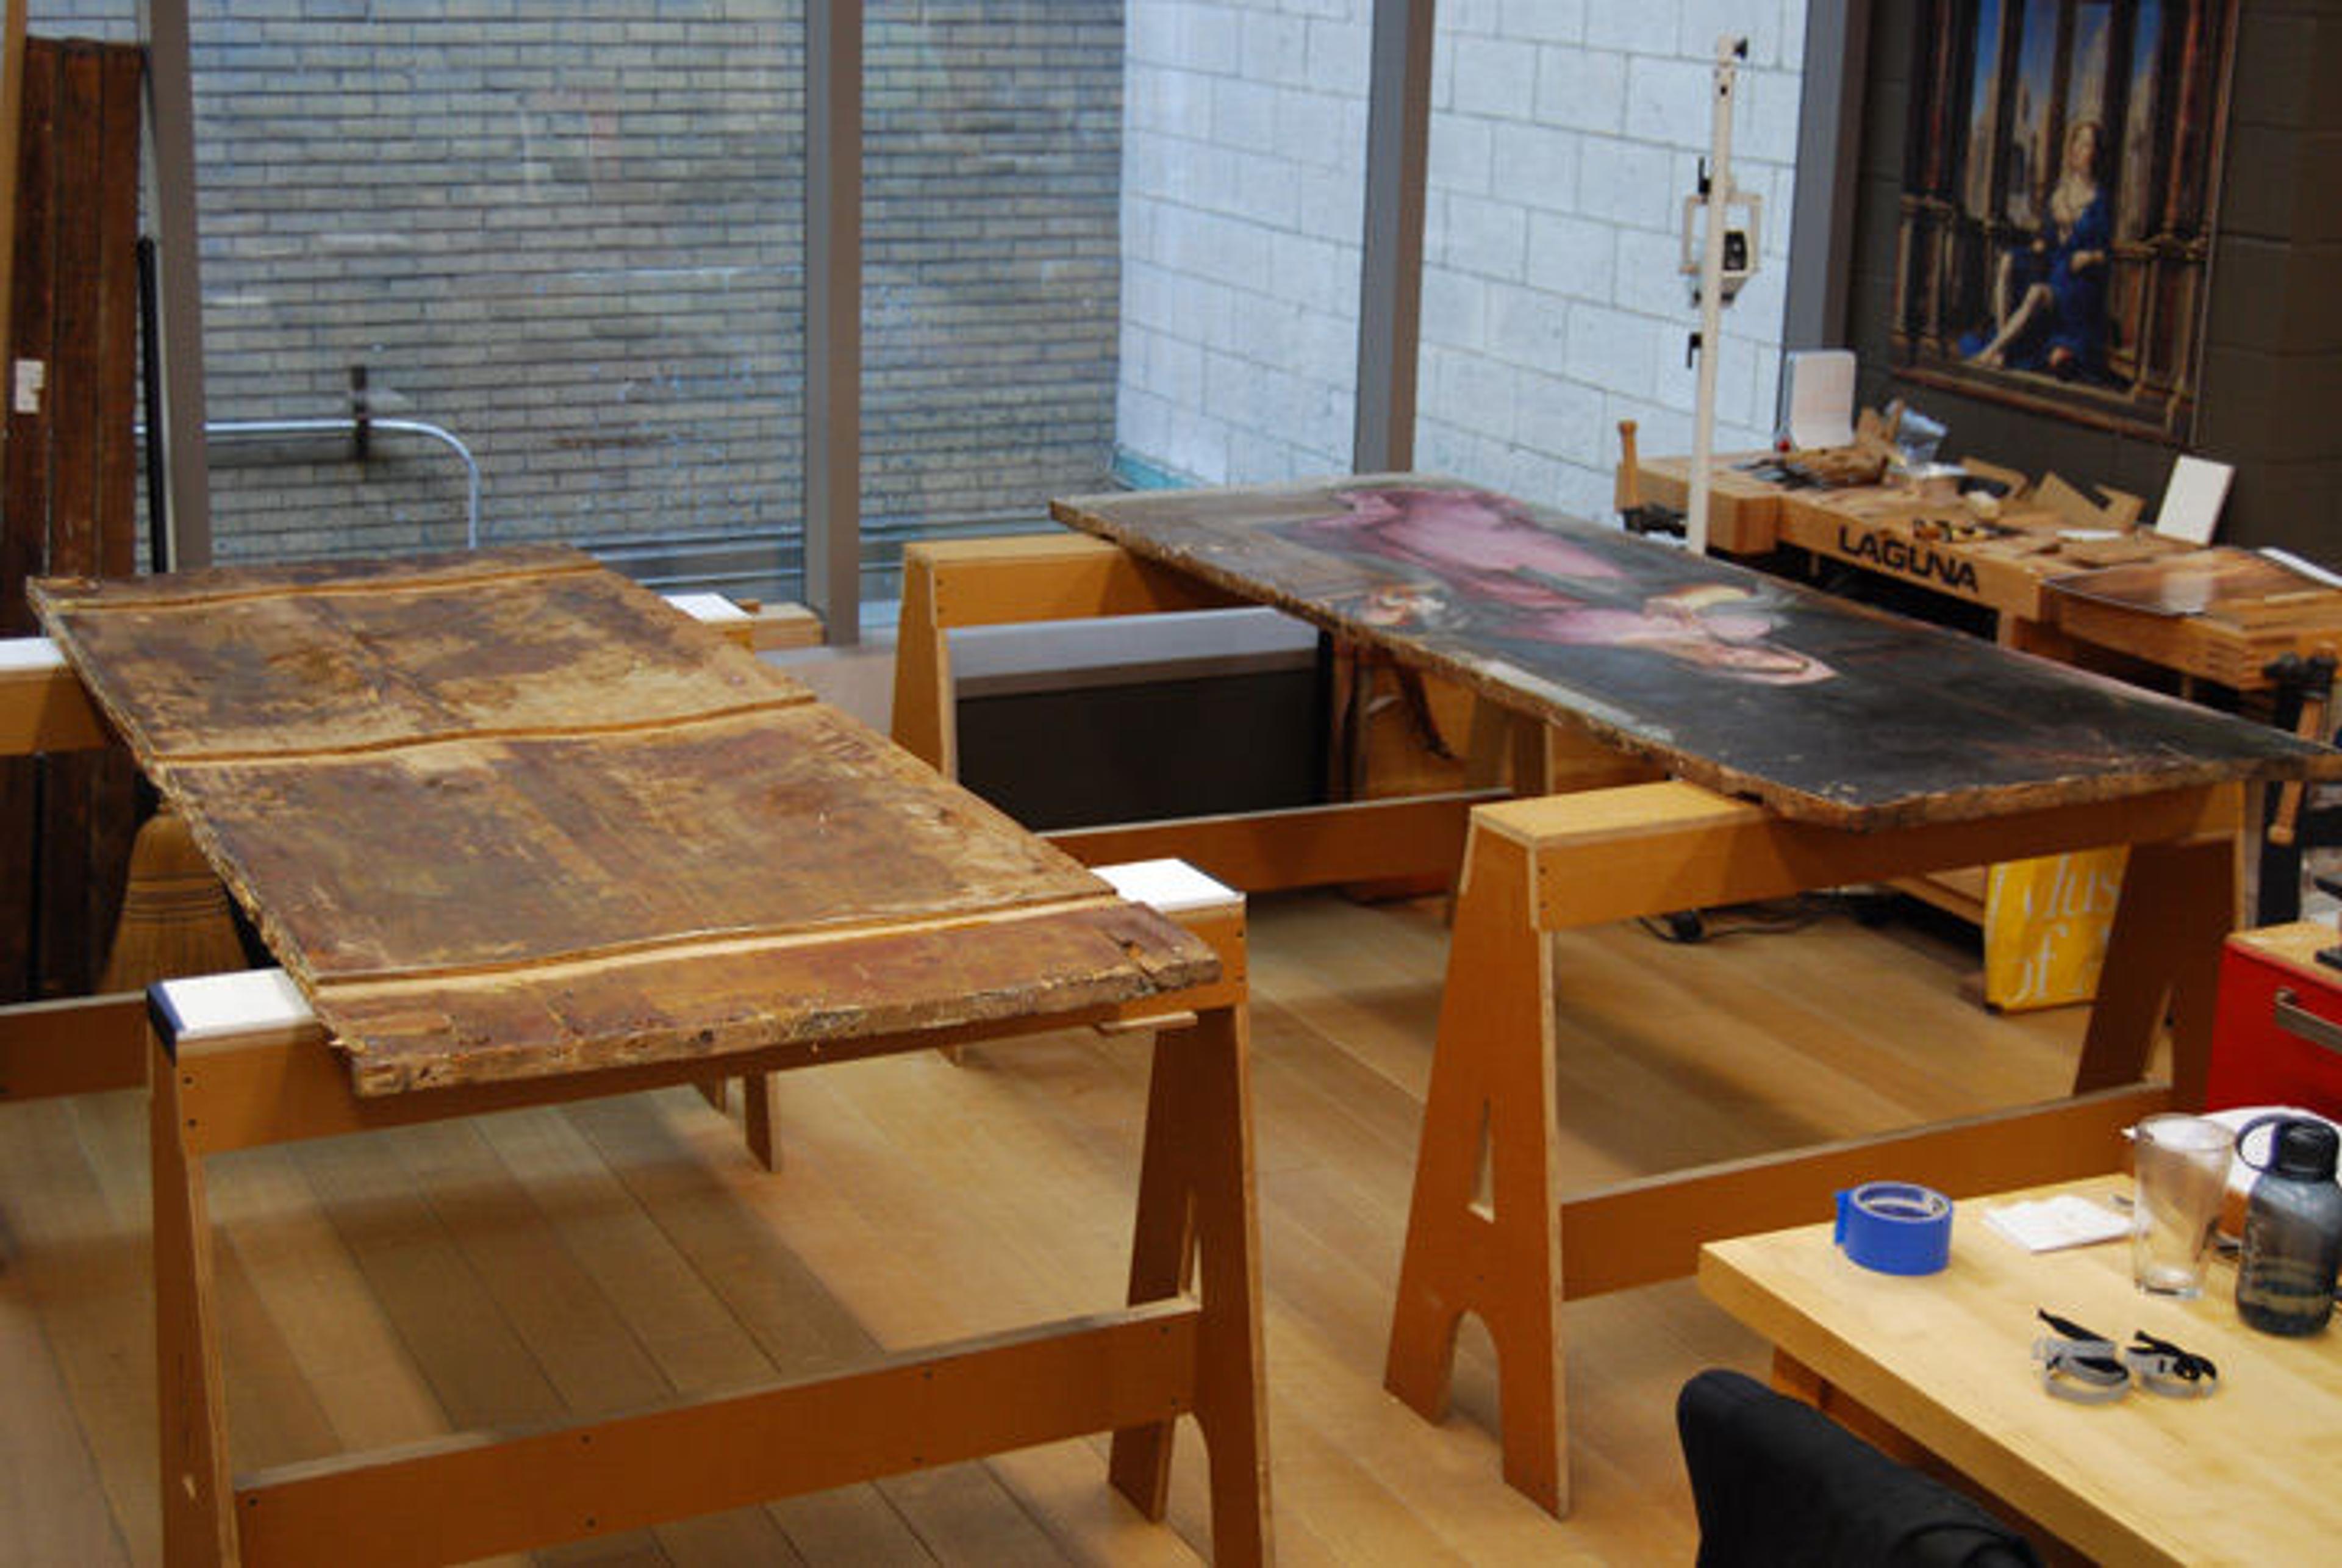
The two halves of the panel, one of which is lying face down, in preparation for structural treatment after being separated. Photo by author
«In part one, we discussed the construction and condition of Peter Candid's The Annunciation. Because of the various splits and cracks in the panel support, we decided to separate the panel into two pieces along the central join, which had already failed, or separated, where it was originally glued. With the panel now divided into two narrower halves, we could properly examine and more easily access the smaller splits in order to repair them. It was at this point that we really understood the extent of the wax penetration into the splits and cracks.»
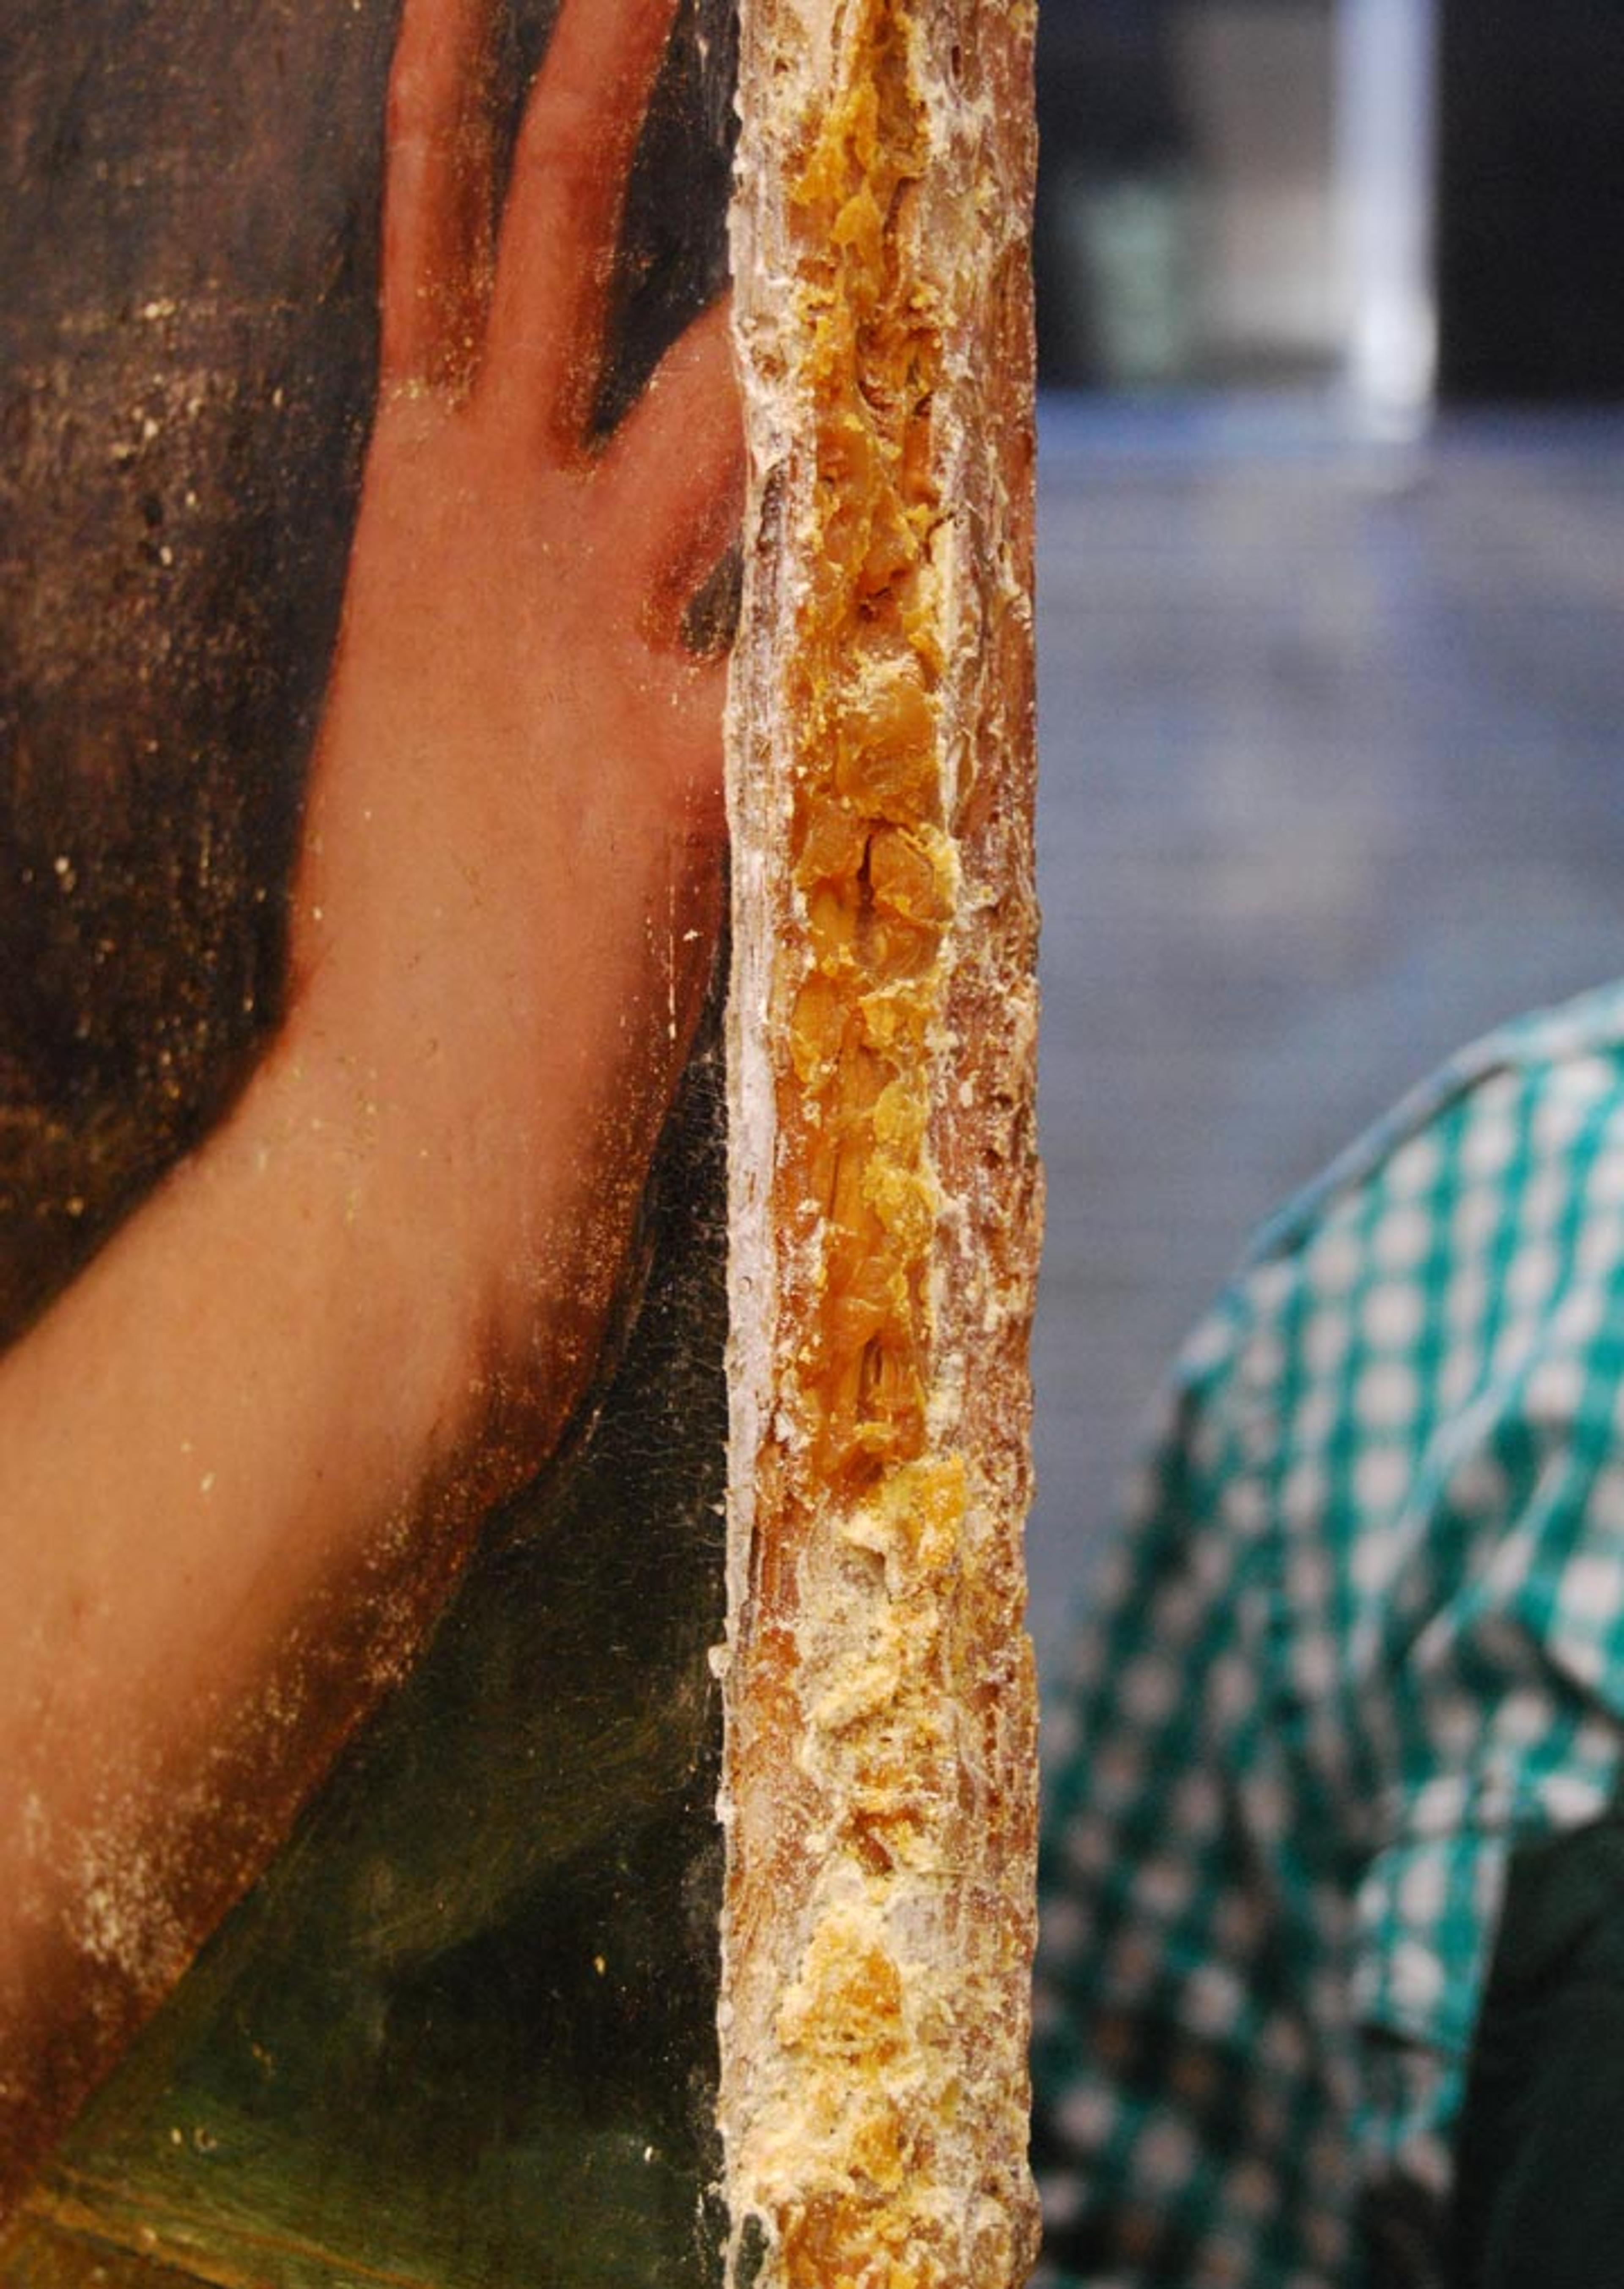
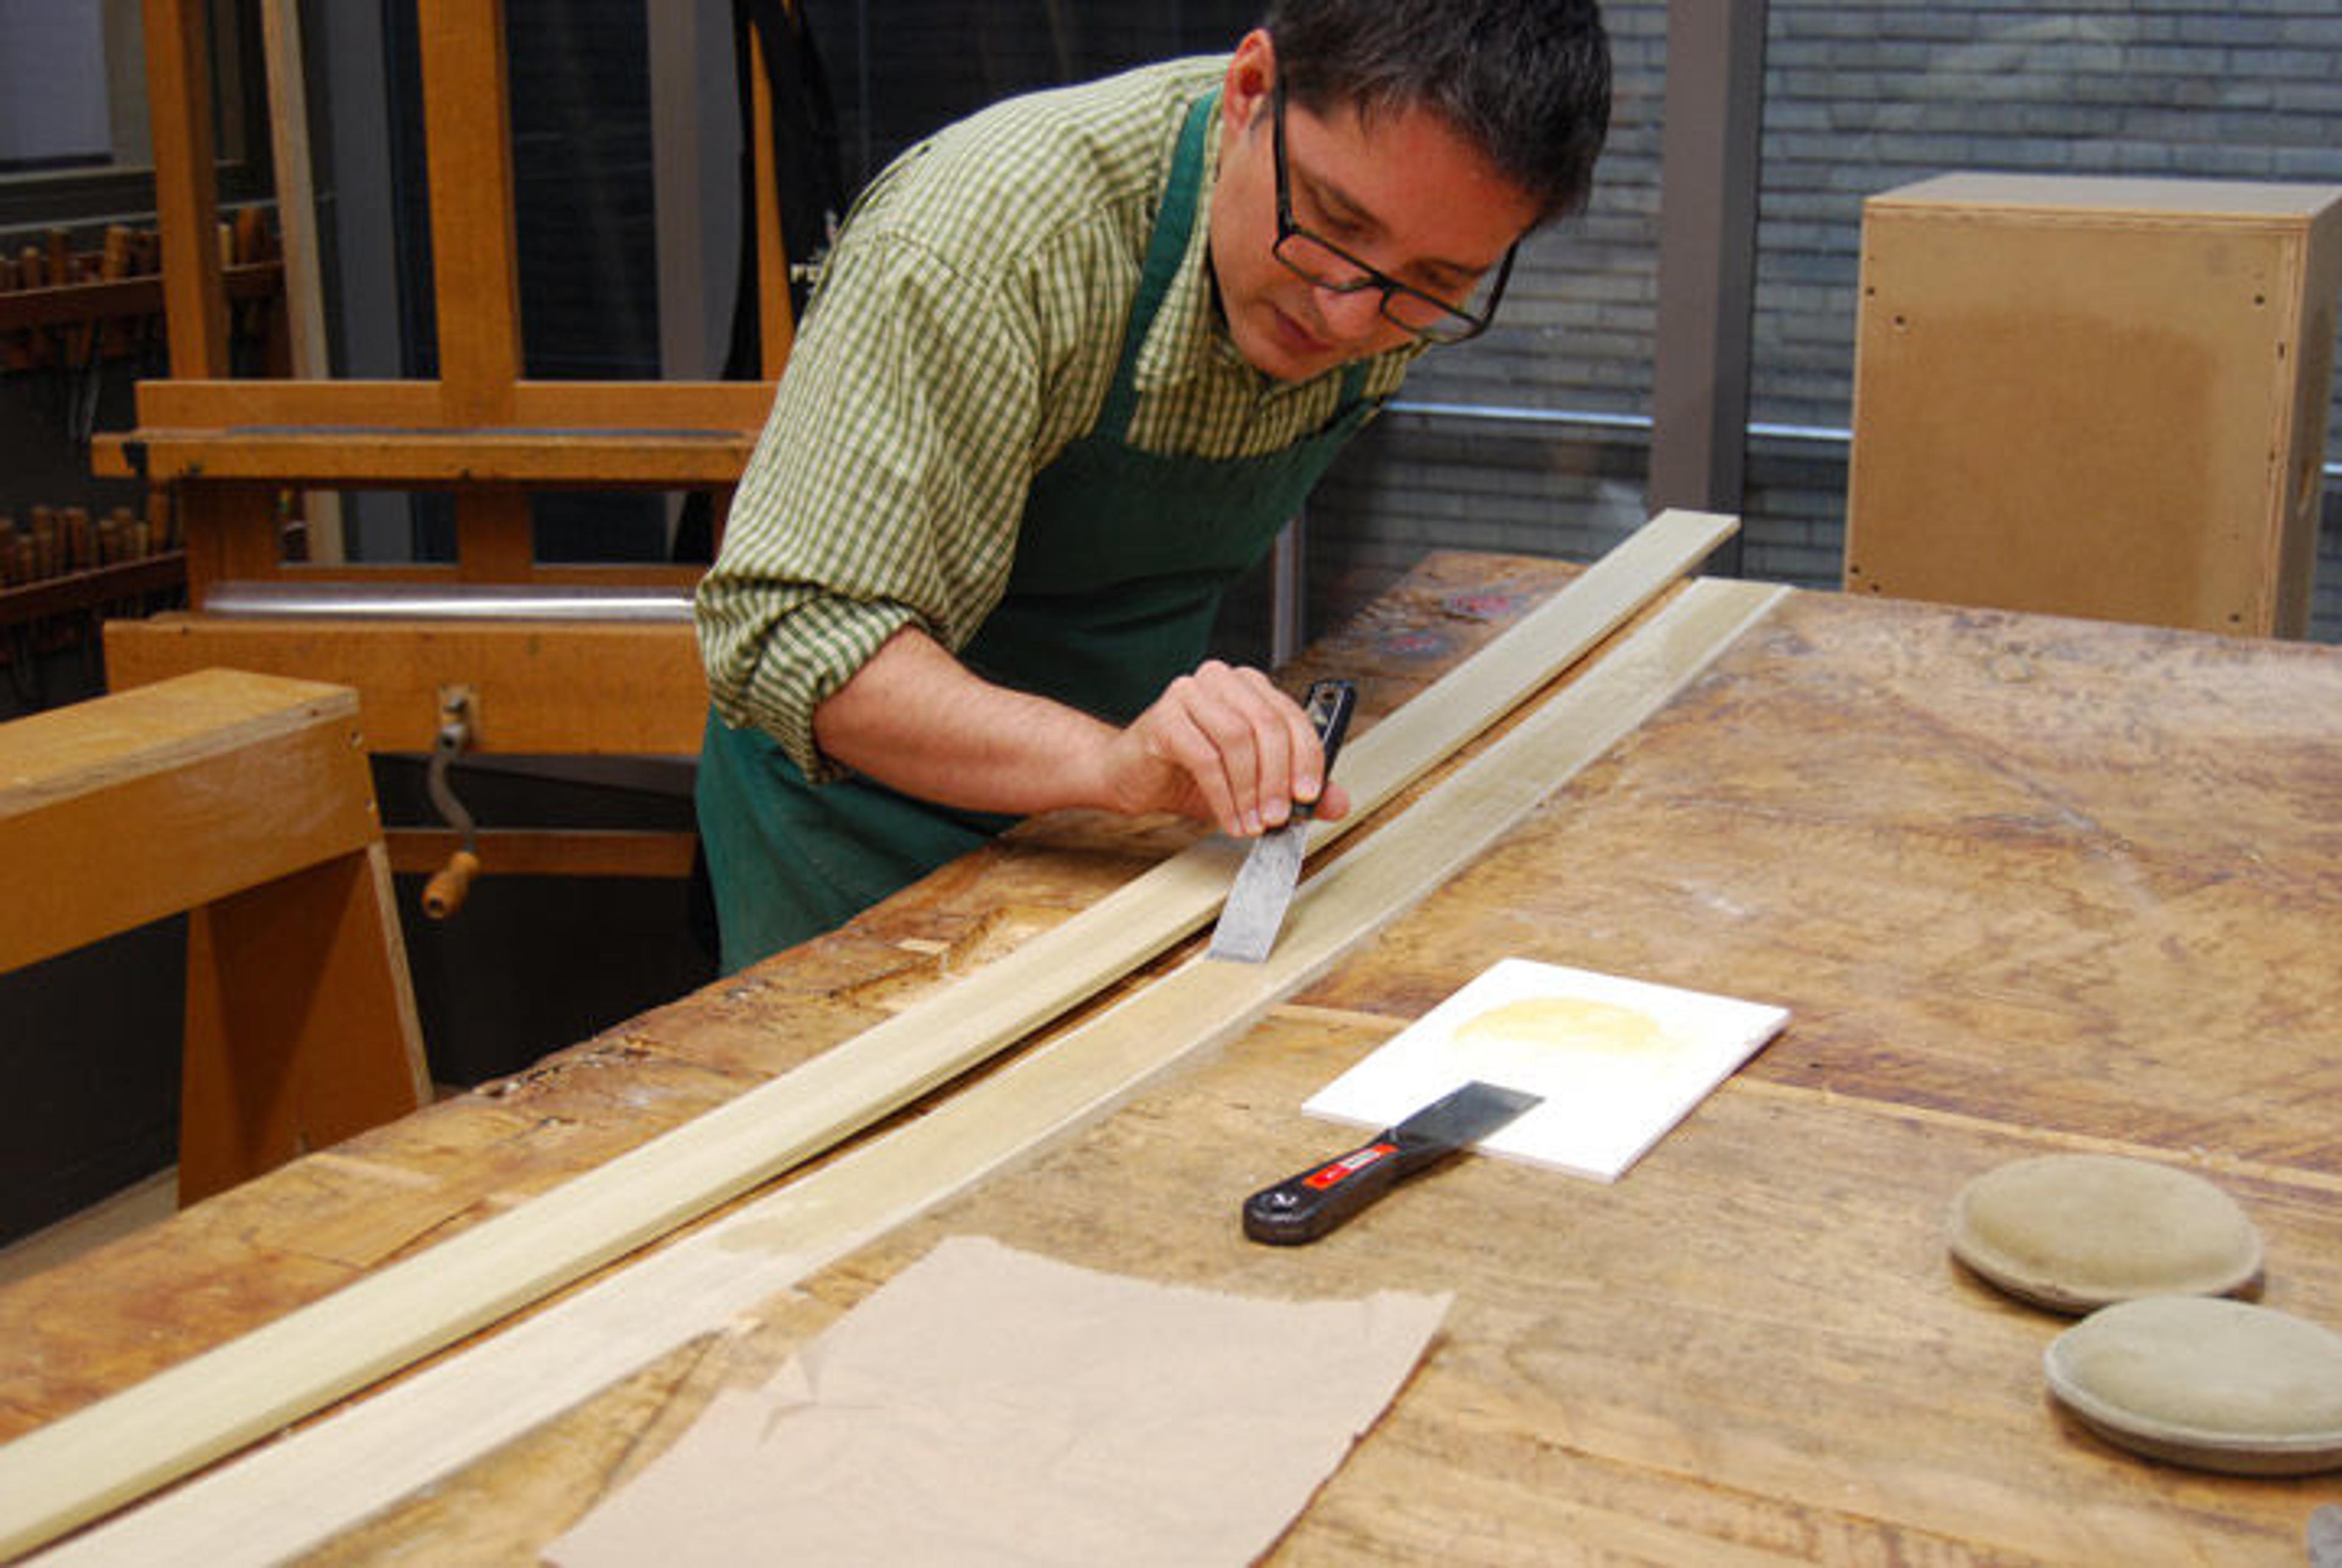
A view of the wax-infused wood. Photo by Aleksandra Hola
In order to trust any glued repairs, we had to be sure that all of the wax was removed from the gluing surfaces. With some splits, the wax could be simply removed with a blade, and then the splits could be glued and clamped. However, it became quite clear that not only had a lot of wax seeped deep into the opened splits and cracks, but a lot had also been absorbed deep into the exposed gluing faces and couldn't be simply scraped away. To create gluing surfaces that we could rely on, we needed to remove enough wax-infused wood to expose fresh wood, and we did so either by hand or using a plunge router.
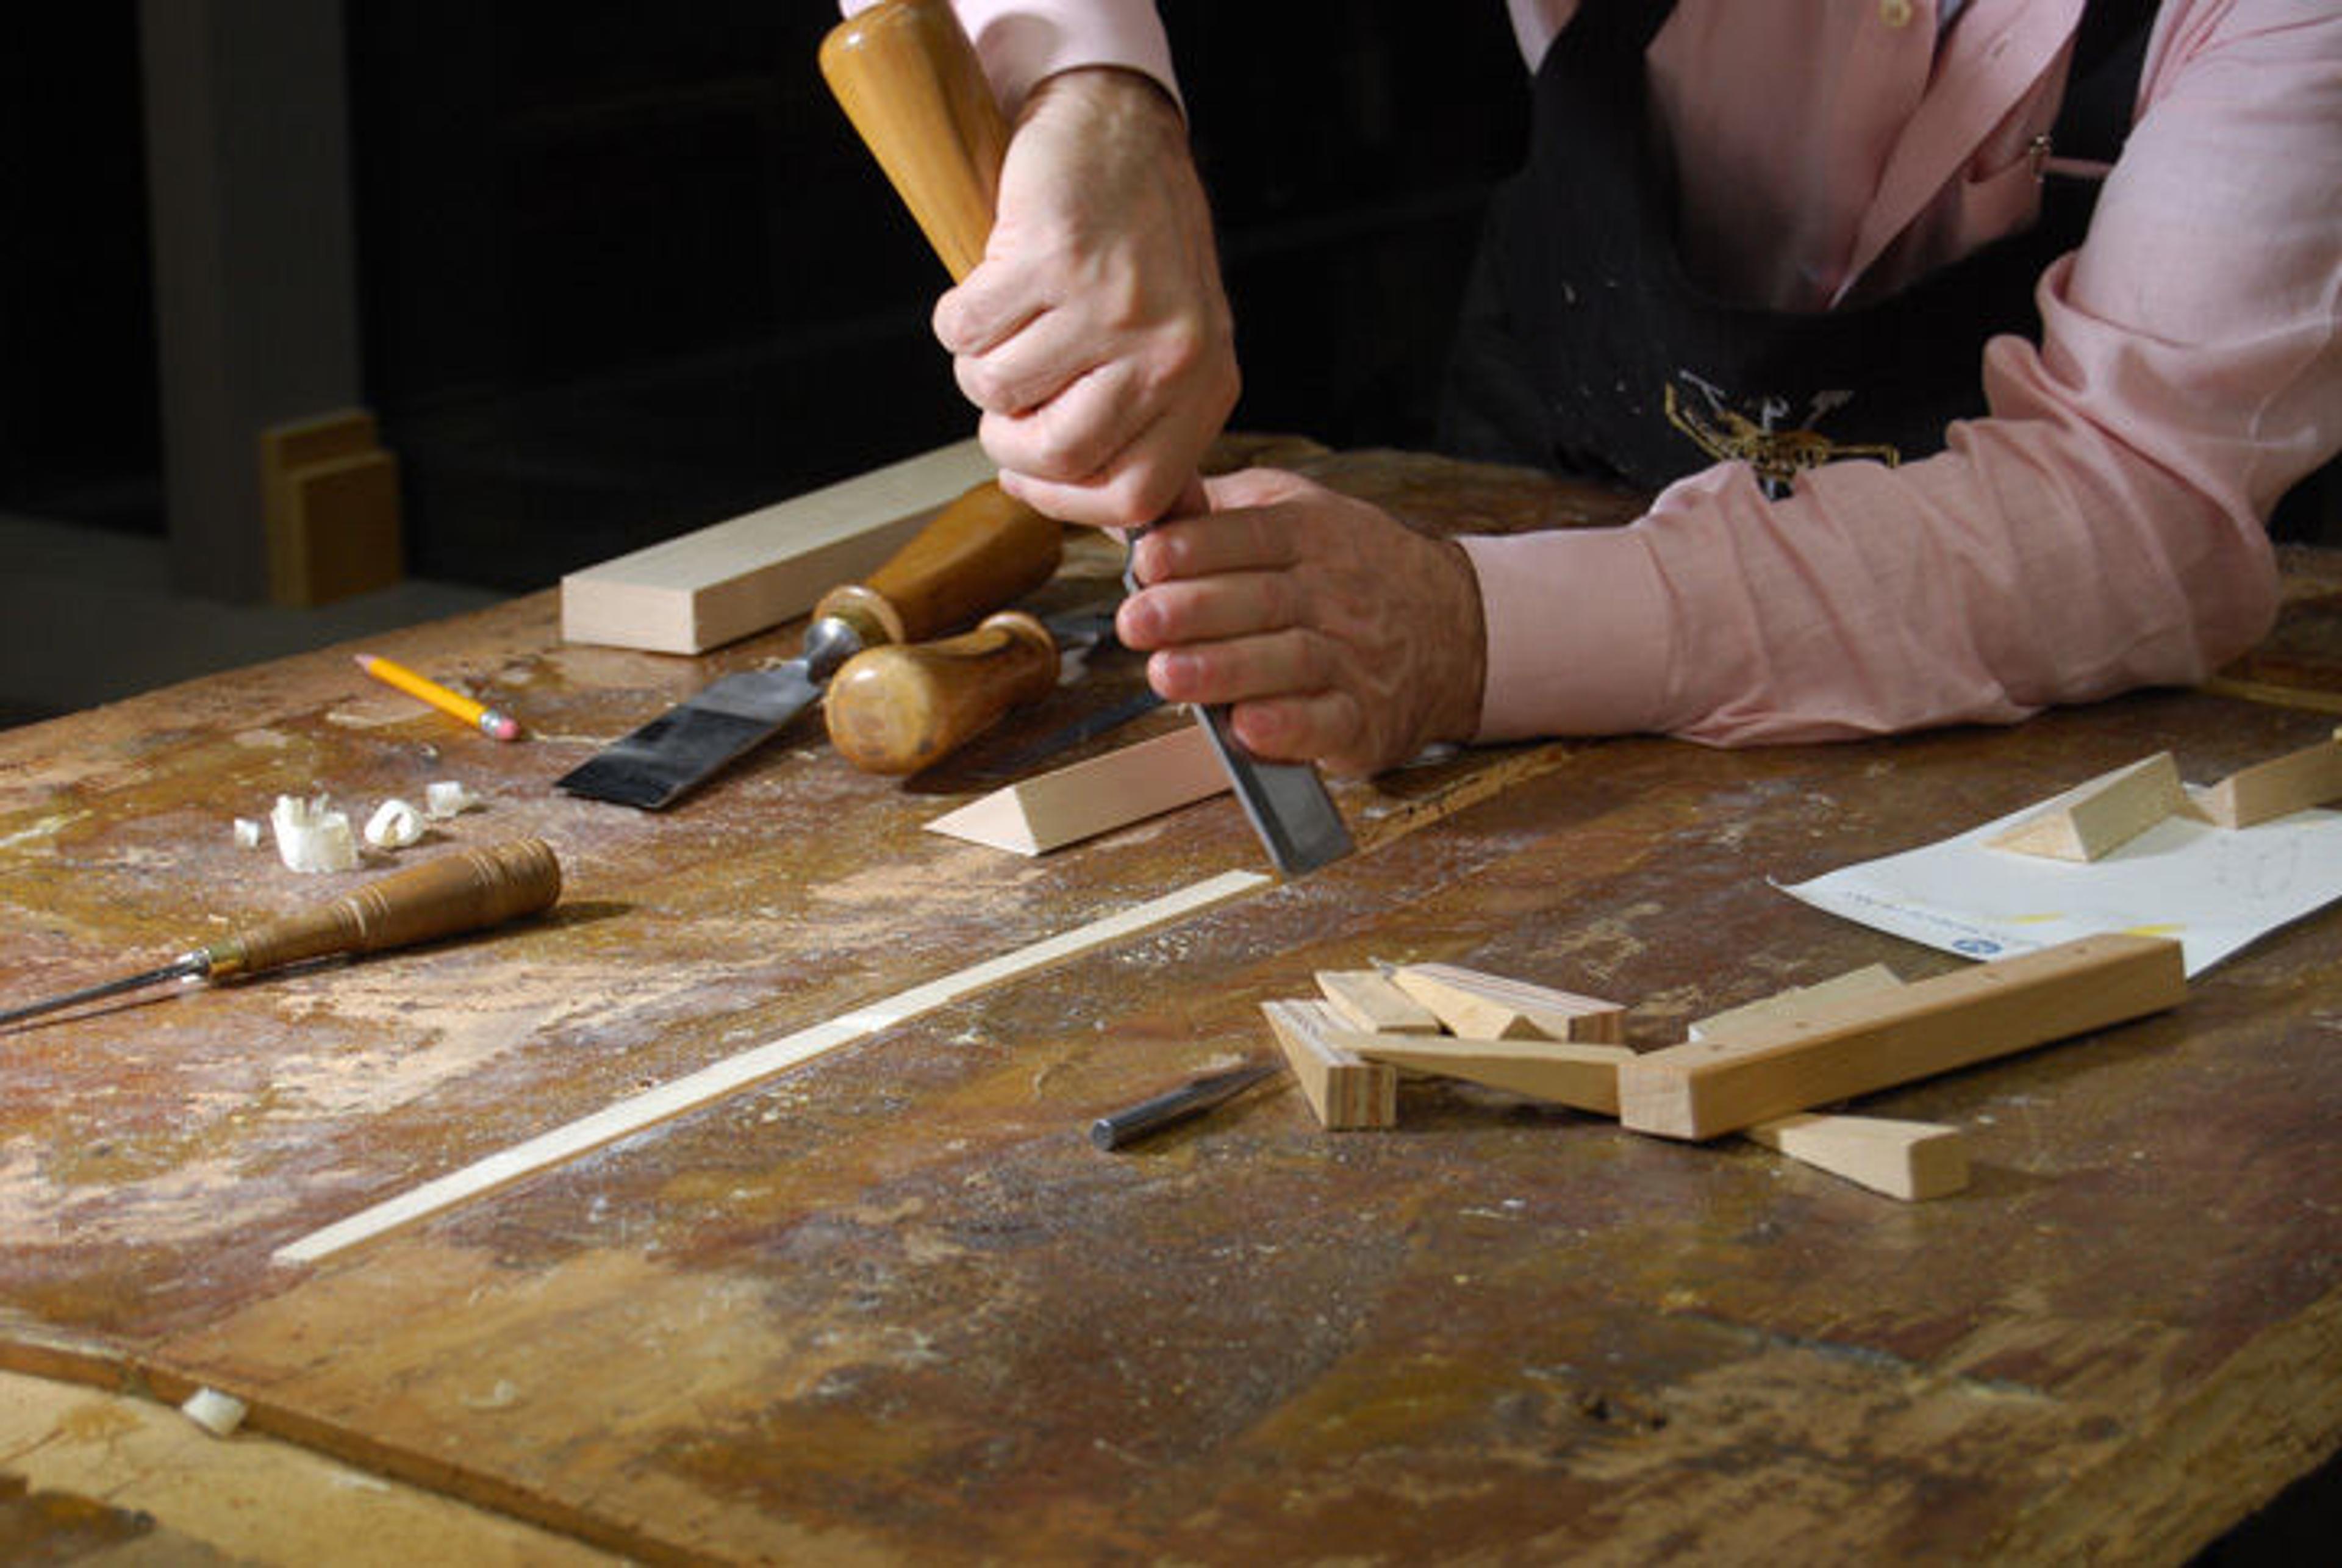
George fitting precisely fit wedge-shaped inserts to repair the panel. Photo by the author
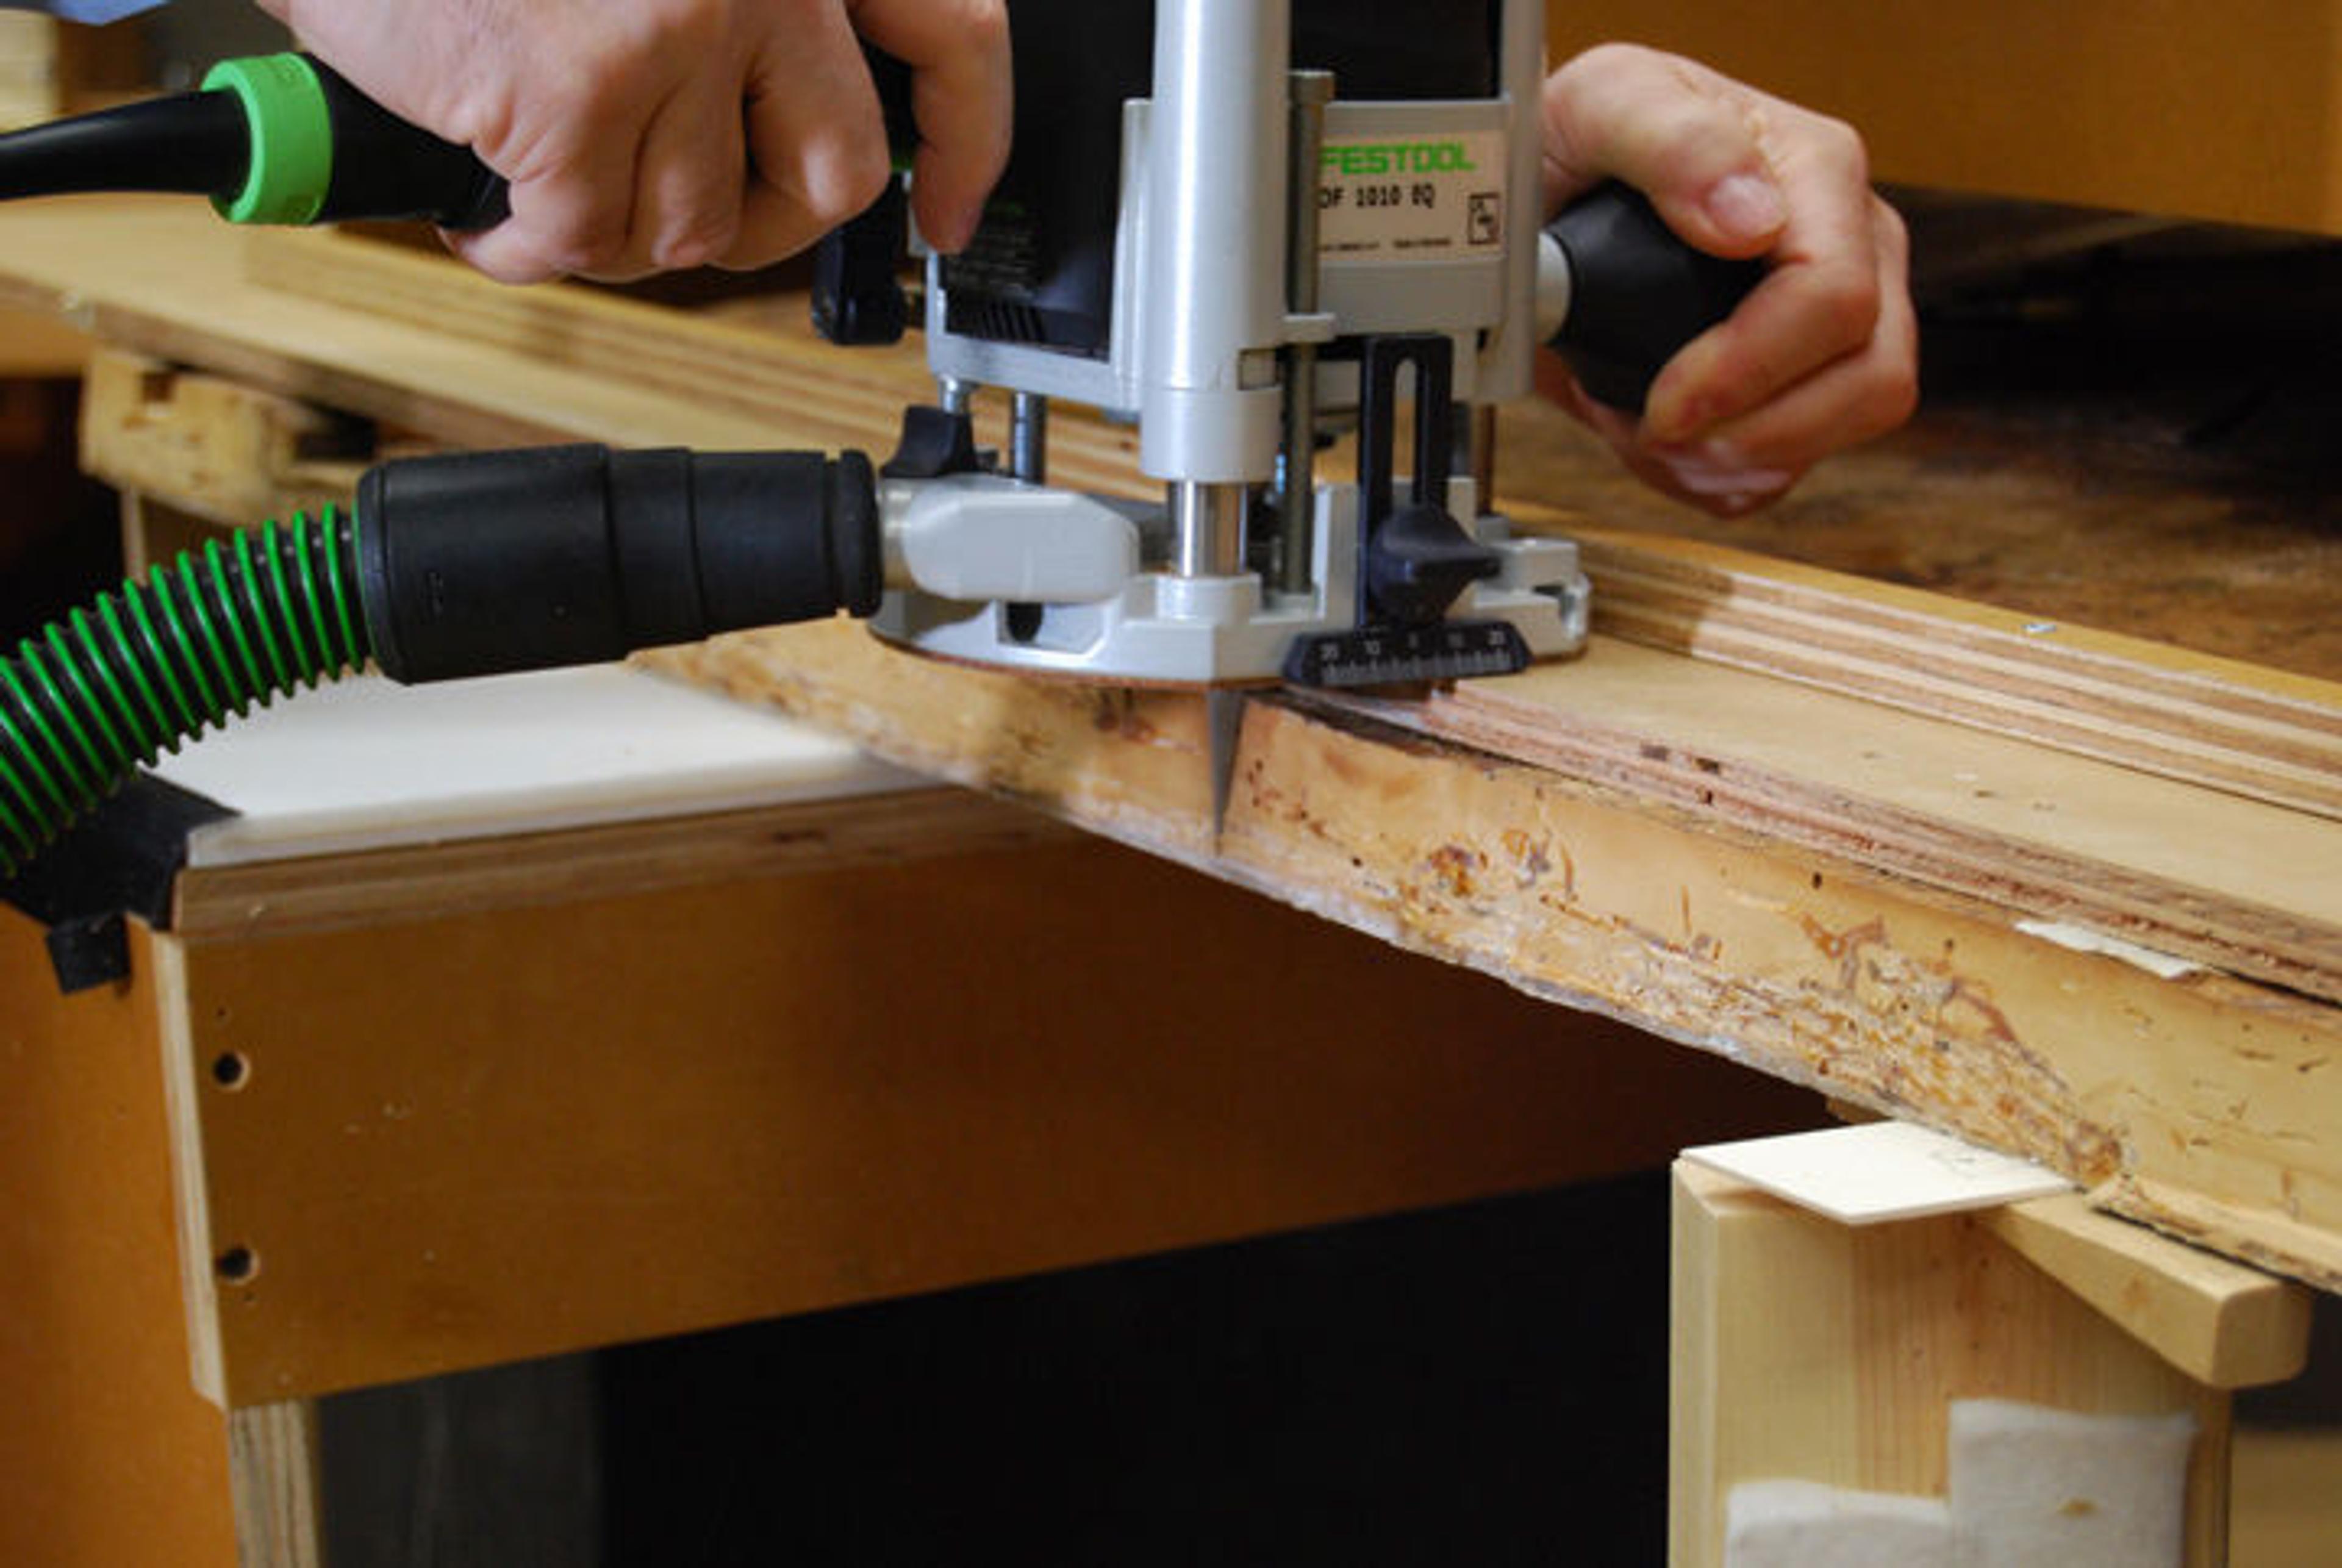
We used a chisel to cut a v-shaped track, carefully following each split and removing as little wood as possible. After we made each v-shaped track, we leveled the paint surface and glued precisely fit v-shaped wedges into the track. This procedure was carried out in several places on both halves of the panel. In a few areas, the procedure could be done with a plunge router fitted with a custom-made acutely pointed cutter. With several careful passes, we removed a very thin amount of wood, exposing new, wax-free surfaces that we could safely use for gluing. We then inserted wedge-shaped pieces of old poplar that were precisely fit and glued them into place. (Whenever possible, we use wood of the same species and age for repairs so it behaves the same as the surrounding wood.)
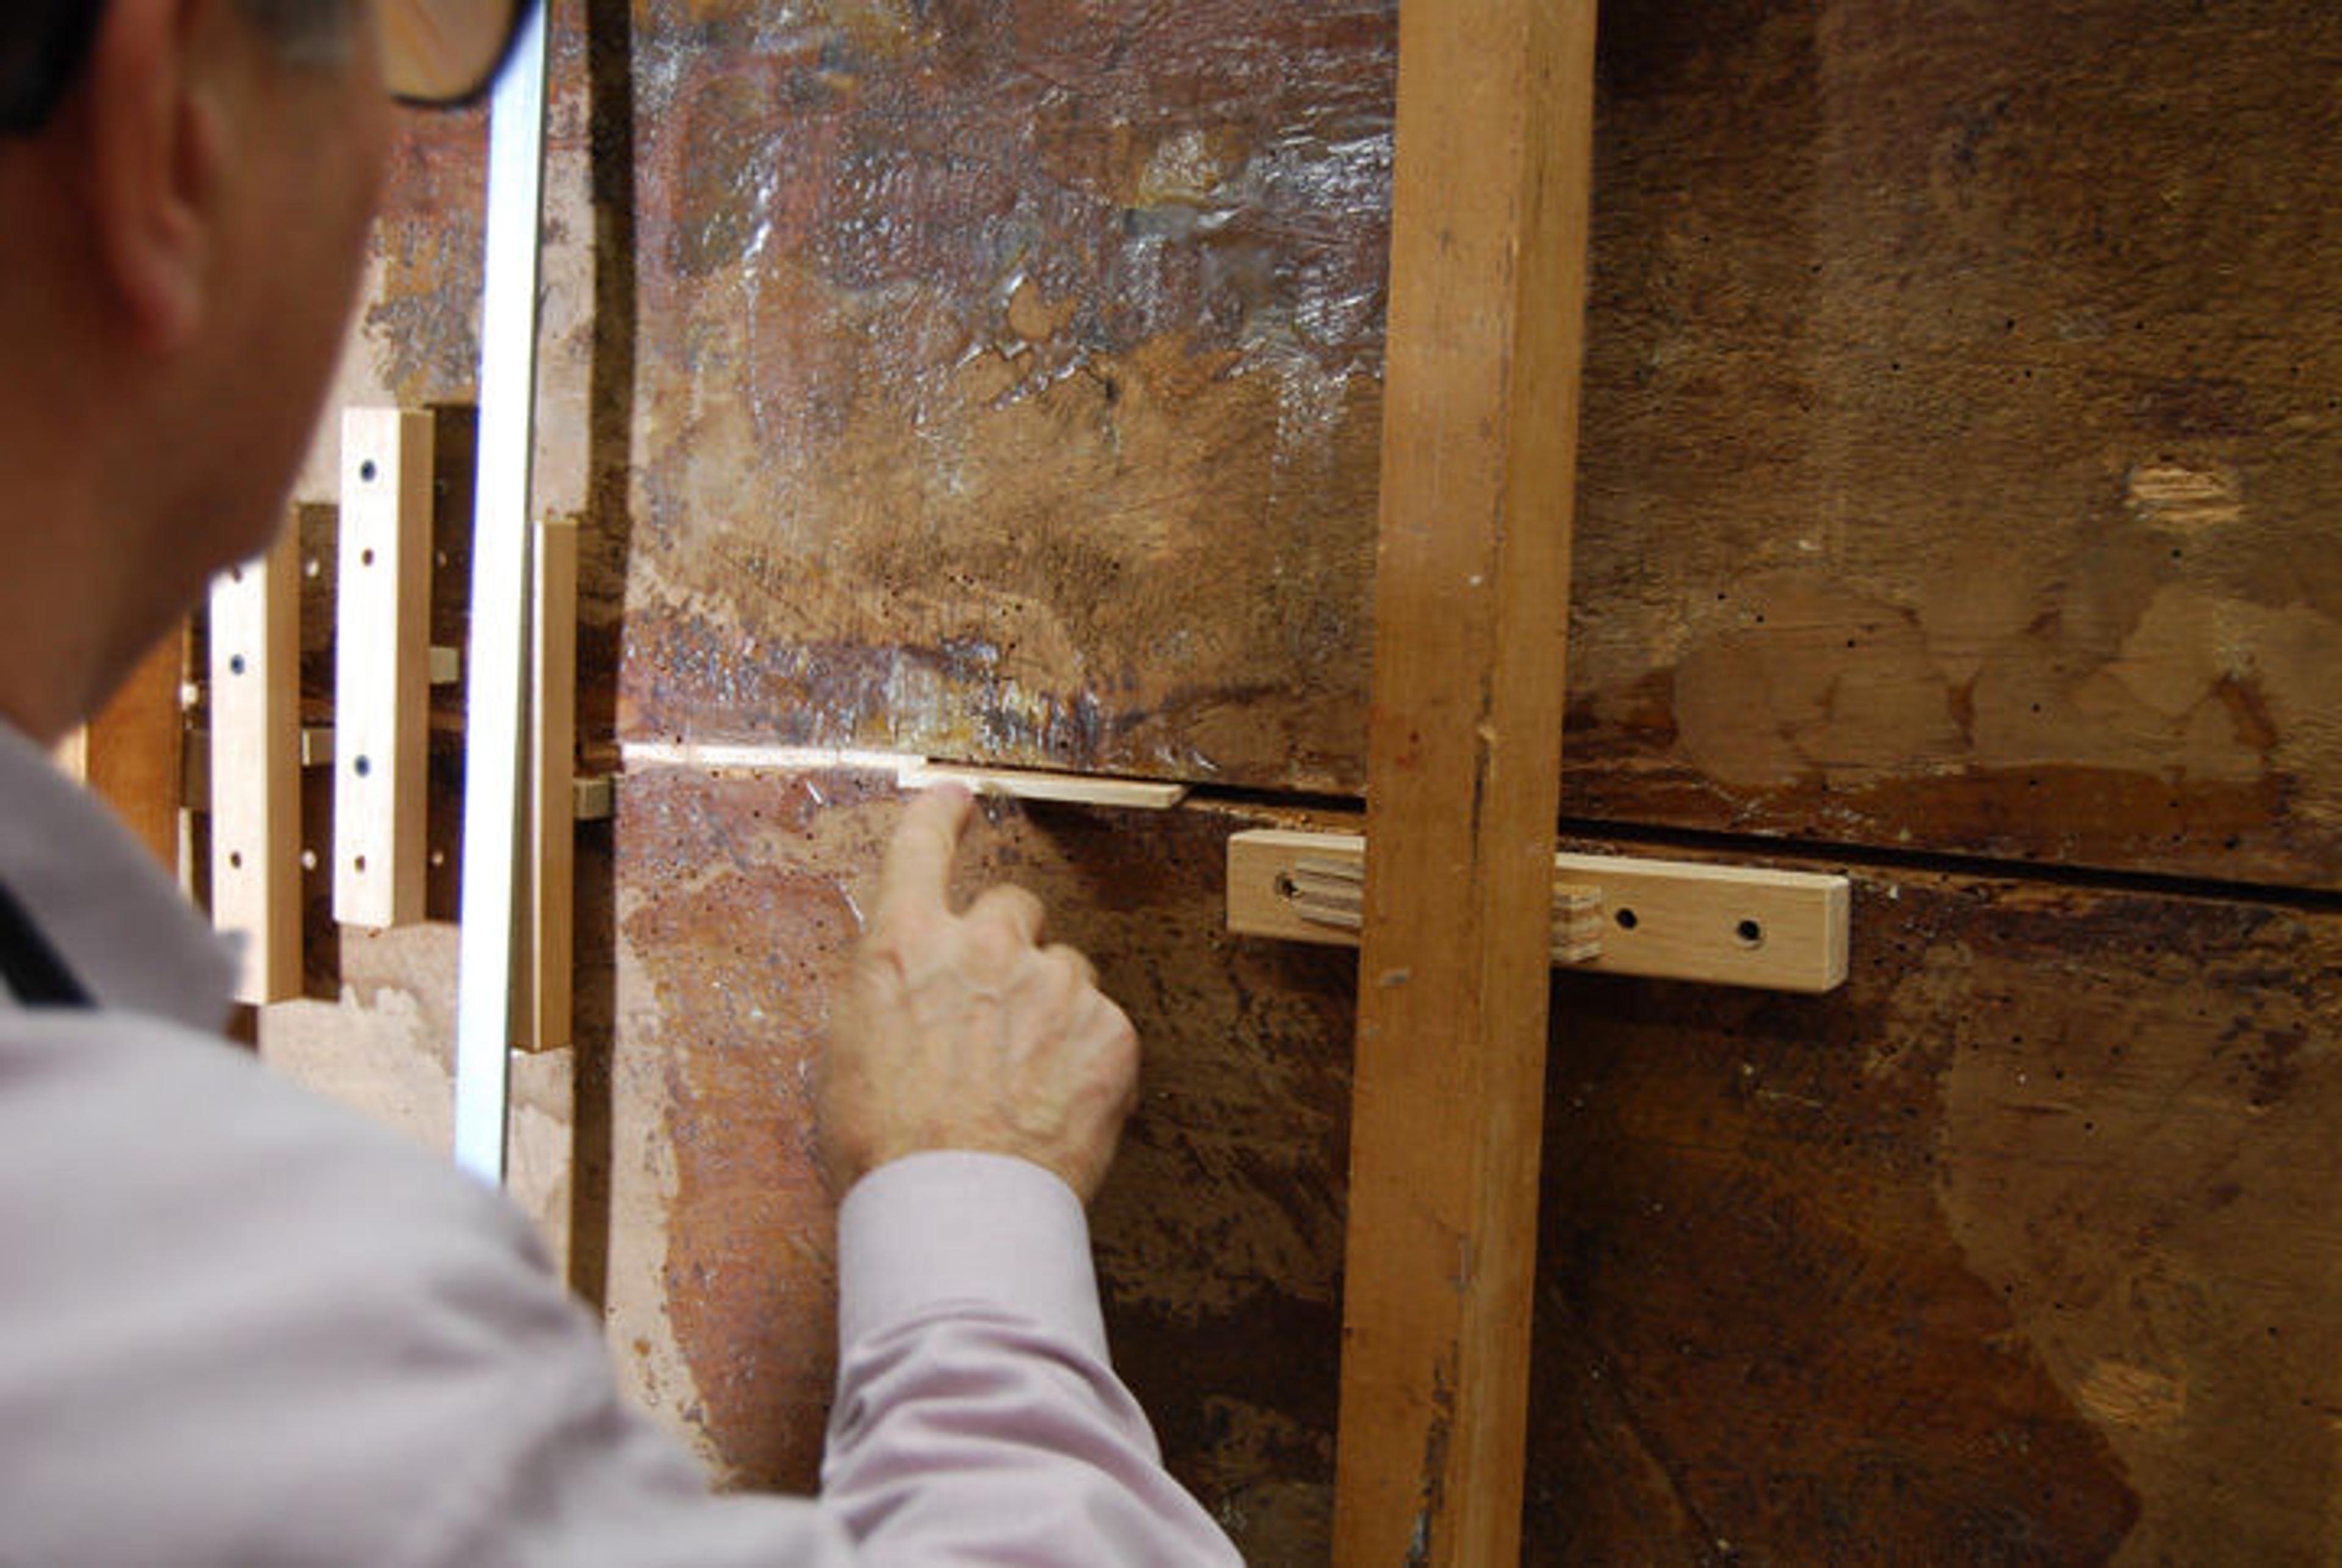
George inserting wedge-shaped pieces into a v-shaped track made with a plunge router. Photo by the author
After the repairs of the individual halves of the panel, it was time to address the central join. We approached this in the same way we did with the smaller splits, but because we now had full access to the join faces, we could more easily do our work. Here, we again used the router to carefully cut the gluing faces. As before, this provided a surface that could ensure a strong bond.
Carefully cutting the central join with a plunge router. Photo by the author
We then needed to determine the final curvature of the panel, which is always a bit tricky and often requires some compromises. The aim is to create a surface free from distortions while maintaining as much planarity as possible. As mentioned in part one, because of washboarding, each individual board that made up the panel developed an irreversible warp, so when seen together, the surface featured a series of peaks and valleys. Where we could, we manipulated the boards when repairing the splits to create a smoother transition between each one. When we added up the individual arcs of each plank, we eventually ended up with quite a pronounced curve over all, as expected.
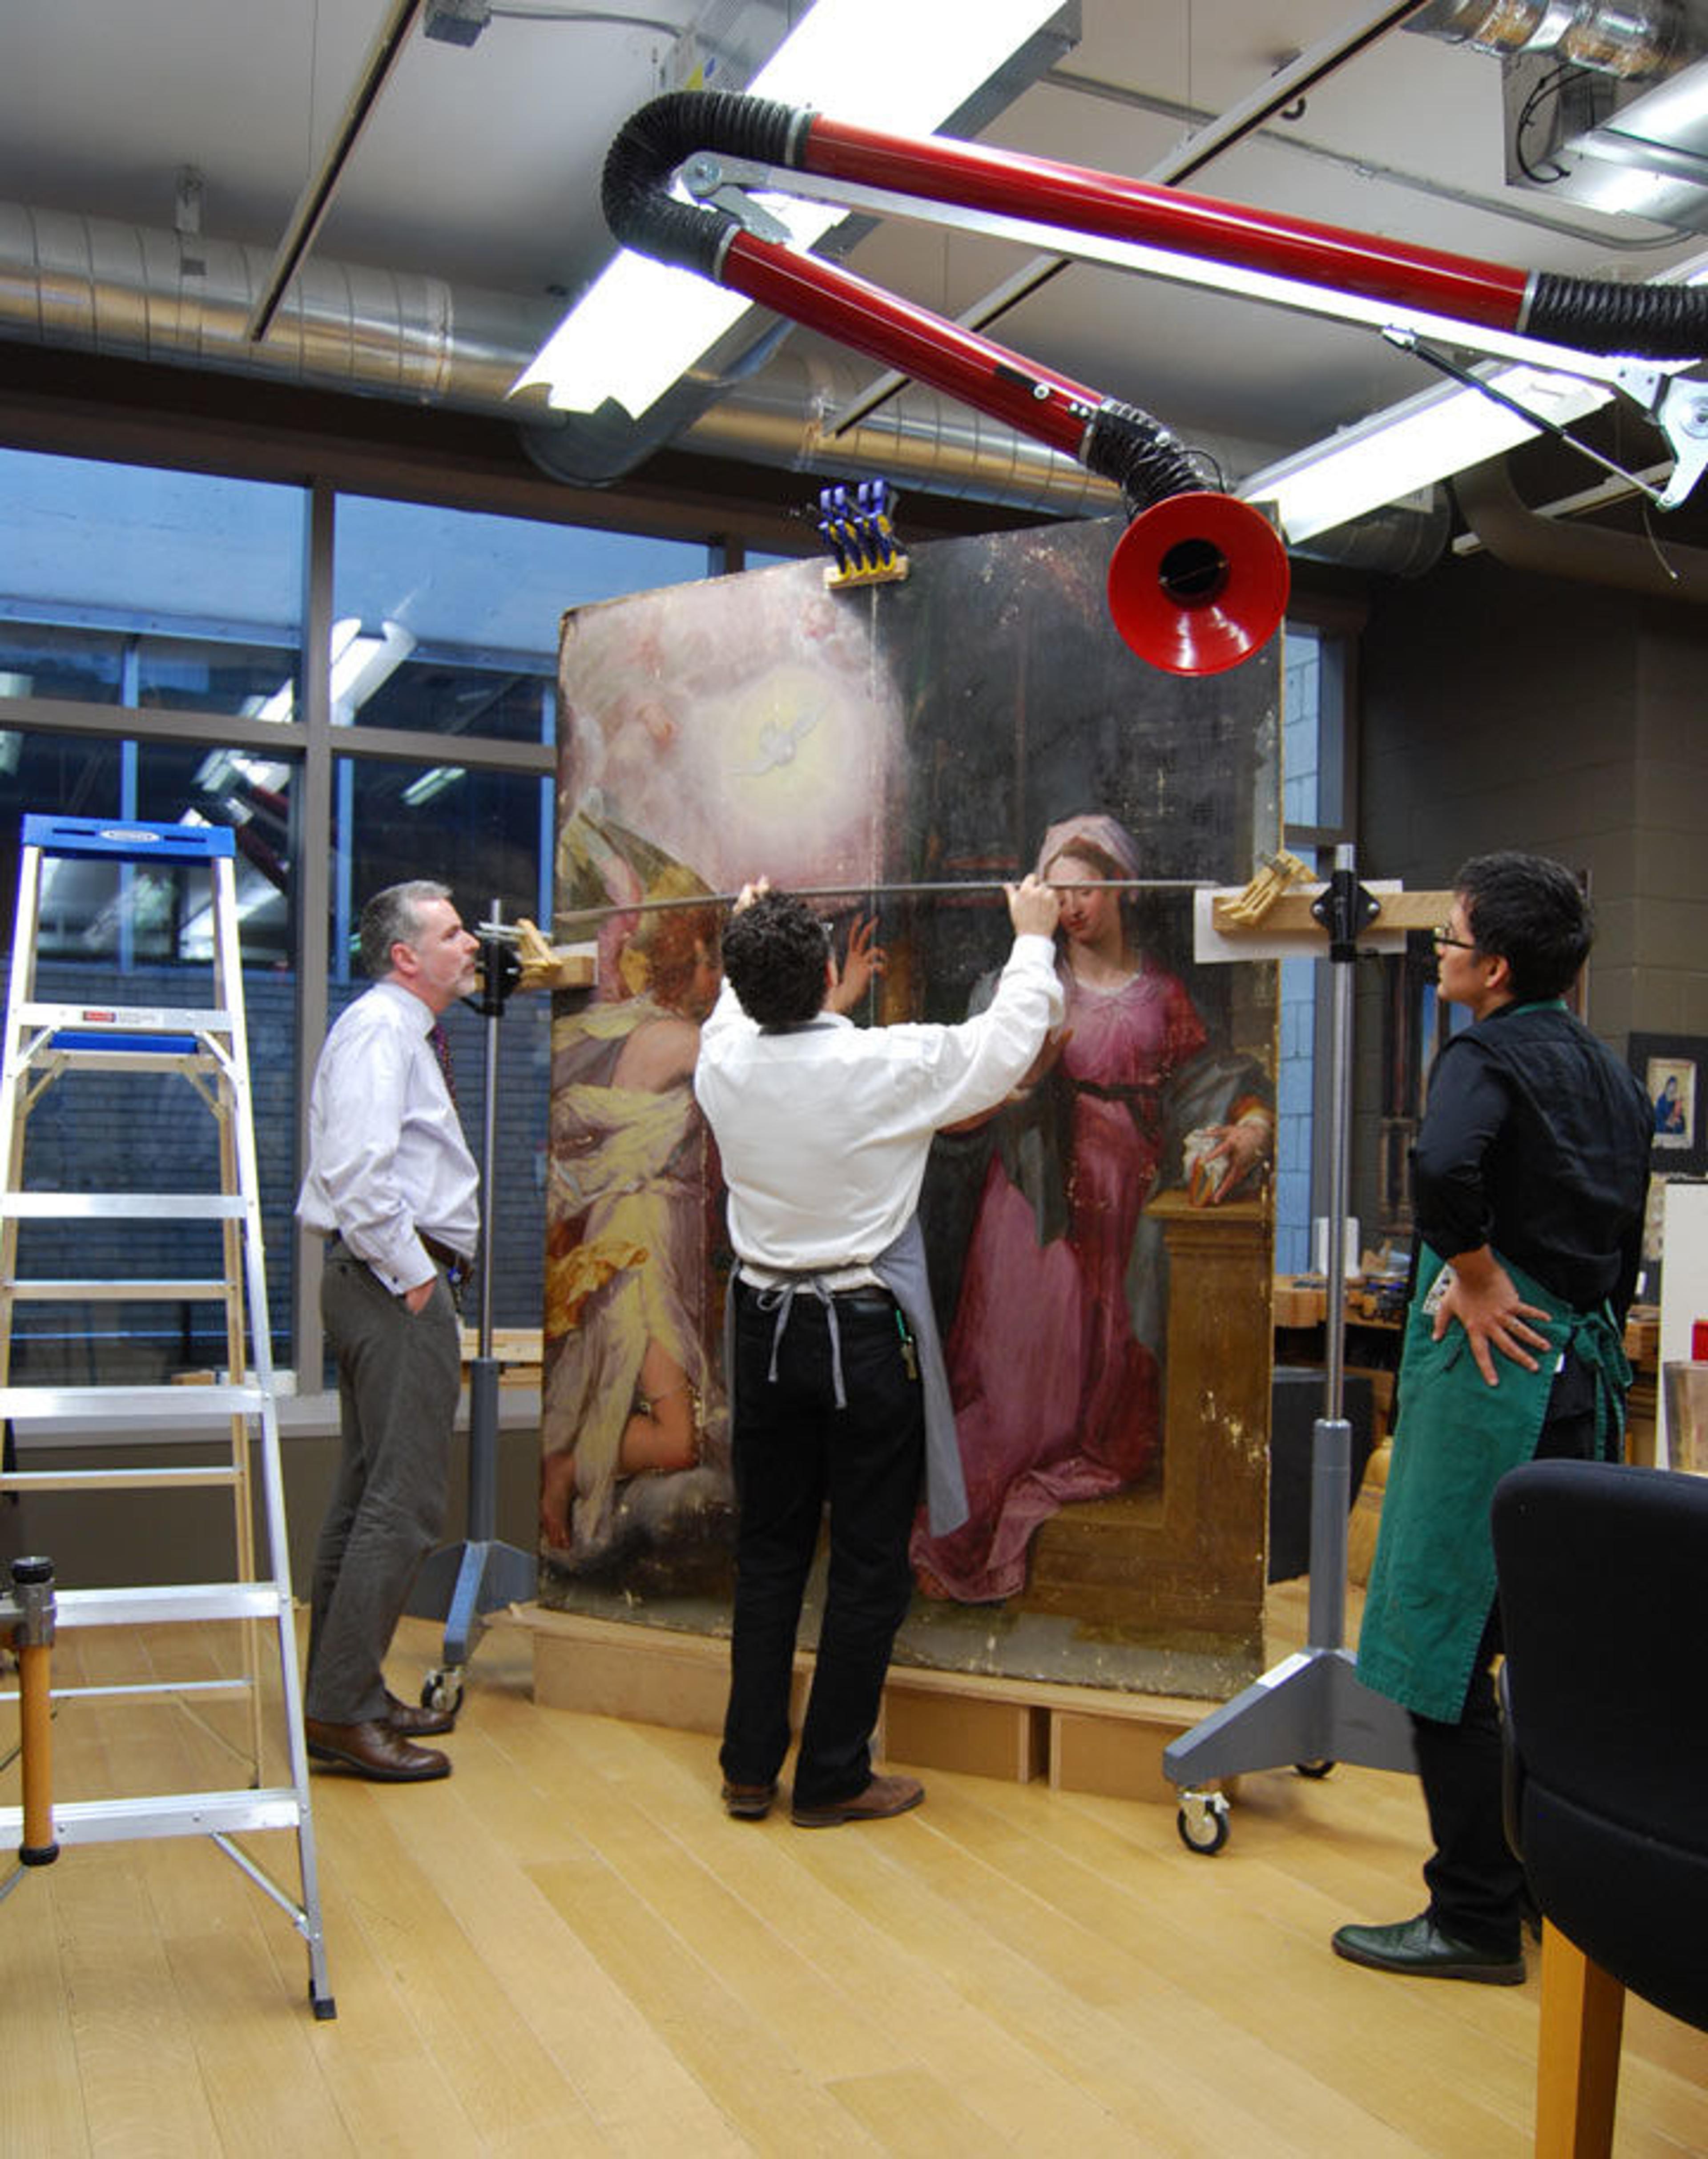
(From left to right) Sherman Fairchild Conservator in Charge Michael Gallagher, Conservator George Bisacca, and Associate Conservator Alan Miller examining the curvature of the panel. Photo by Aleksandra Hola
We solicited the opinion of Michael Gallagher, Sherman Fairchild Conservator in Charge, to determine the curvature we thought would be best for the painting. With the final curvature established, forms were created to hold the panel in that shape while we carried out the remainder of the treatment. The two halves were glued together, again using v-shaped wedges that carefully fit the routed track.
George carefully placing the two sides of the panel down on shaped forms in preparation for gluing. GIF by the author
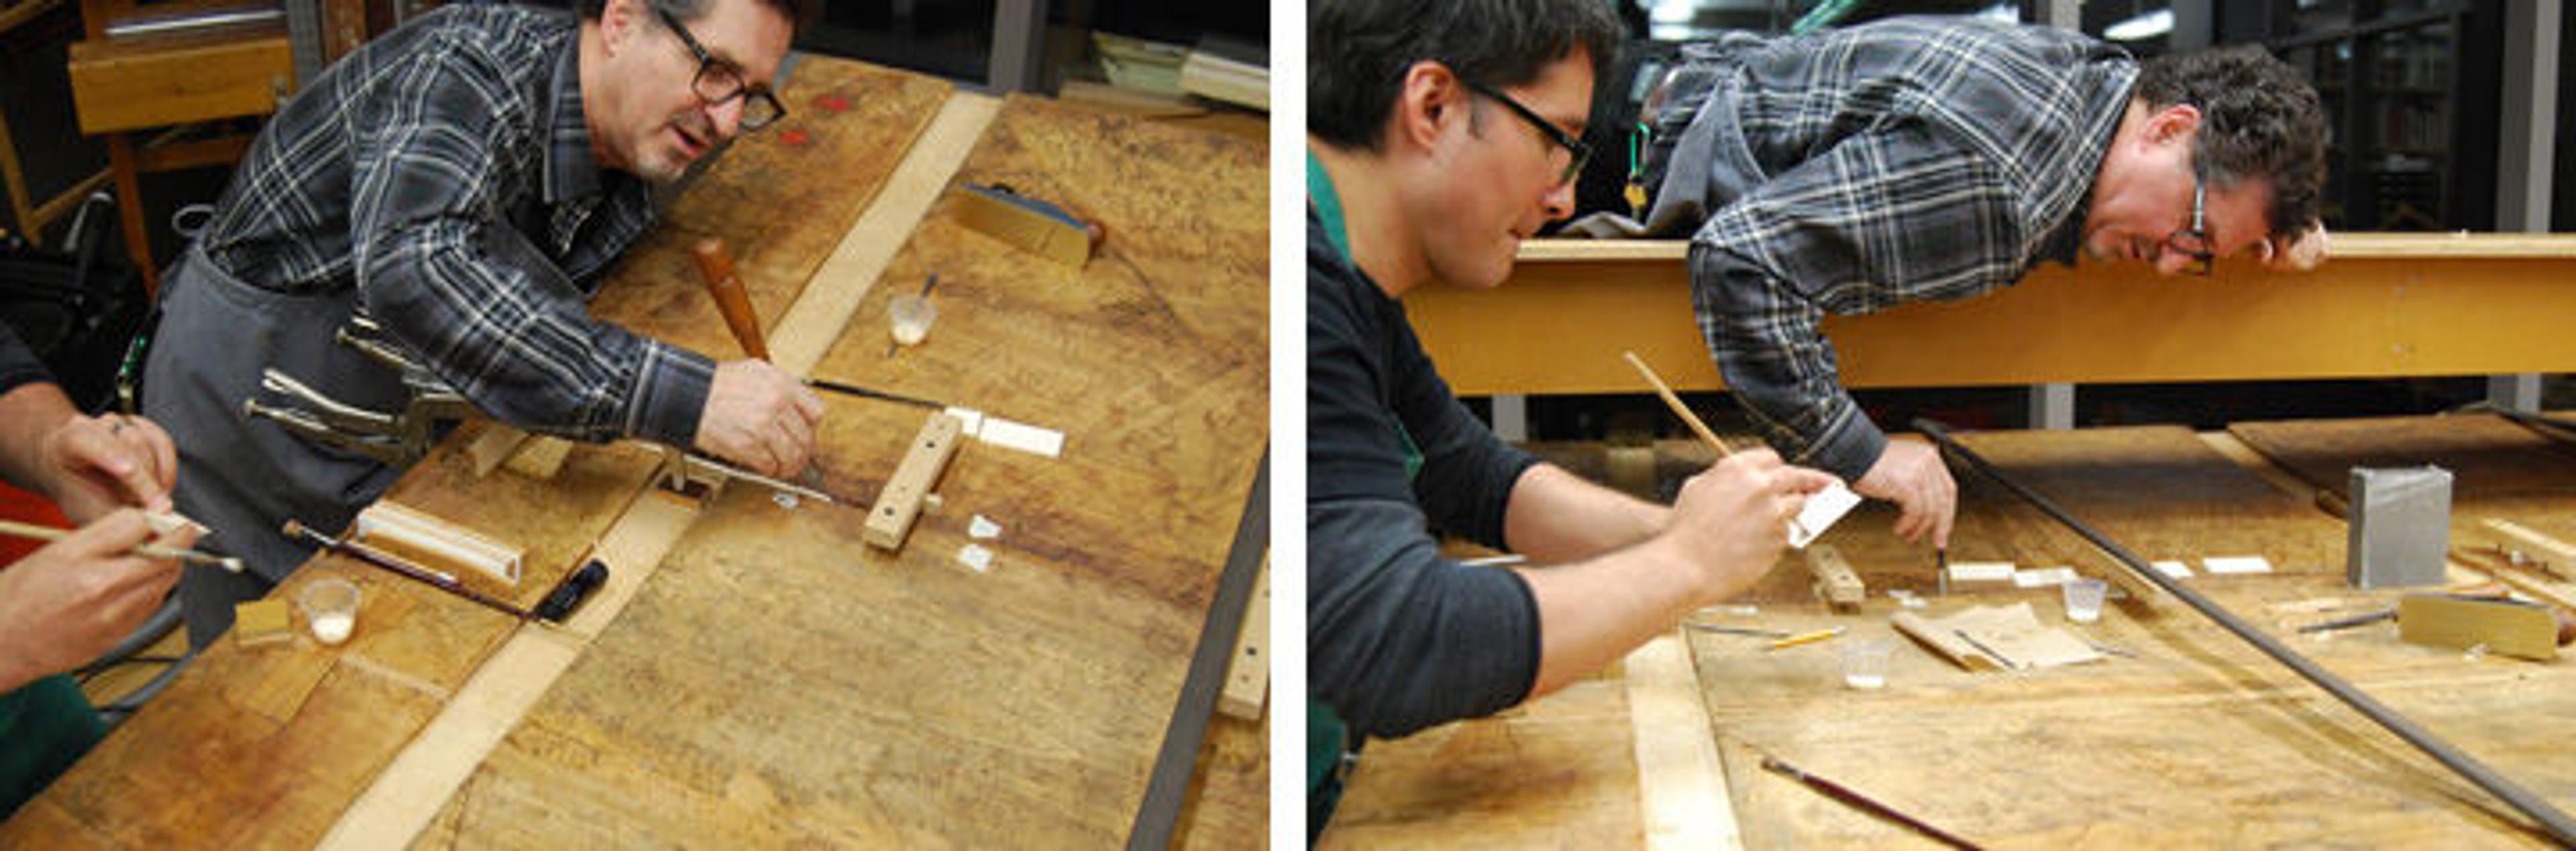
Alan (left) and George (right) gluing v-shaped wedges to rejoin the two halves of the panel. Photo by Aleksandra Hola
With the panel complete again, it was time to address the secondary support. In the past, battens were often removed to help relieve any stress that would build as a panel warped. While these battens were often discarded, we were fortunate in that we retained the original ones for this panel, but were unfortunate in that they were responsible for splitting the panel. What to do?! Our options were simple: we could either leave the battens off the panel and place them in storage—where they would never again function as they were designed—or repurpose the original battens in a new secondary support system. We opted for the latter.
The battens were quite rigid and could no longer be used in their current form, and the tracks that held the battens were now curved and wouldn't accommodate a straight, rigid batten. Additionally, the tracks no longer had a uniform curve, so we would have to modify both the battens and the tracks. Because the battens would no longer be able to function in the same way by providing rigidity and also allowing the panel to move in changing environmental conditions, we needed to come up with a different way of supporting the panel. We opted for a system used on earlier structural treatments, employing a spring system to provide controlled restraint.
First, we needed to modify the dovetailed track without planing away any wood from the bottom of the track. We decided to add small, carefully fitted dovetailed blocks into each track. By planing down these new blocks, we could create a new uniform curve on which we could attach the modified battens.
Adding the carefully fitted dovetail blocks into the tracks. Photo by the author
We glued a strip of wood onto these blocks to connect them together. With the strip of wood attached, the row of blocks could no longer be slid out, but afforded enough movement to account for small amounts of expansion and contraction. Now that we had a uniform curve, it was time to modify each batten.
Alan gluing a strip of wood onto the blocks. Photo by George Bisacca
The battens cannot simply be flexed to fit the new curve. They need to be permanently modified into a curved shape. To do this, we cut each batten longitudinally into three layers and laminated them back together following the new uniform curve of the rebuilt track. We left a hollow chamber within the laminated curved batten, which would accommodate the spring system, and bored holes along the entire length to hold each spring mechanism.
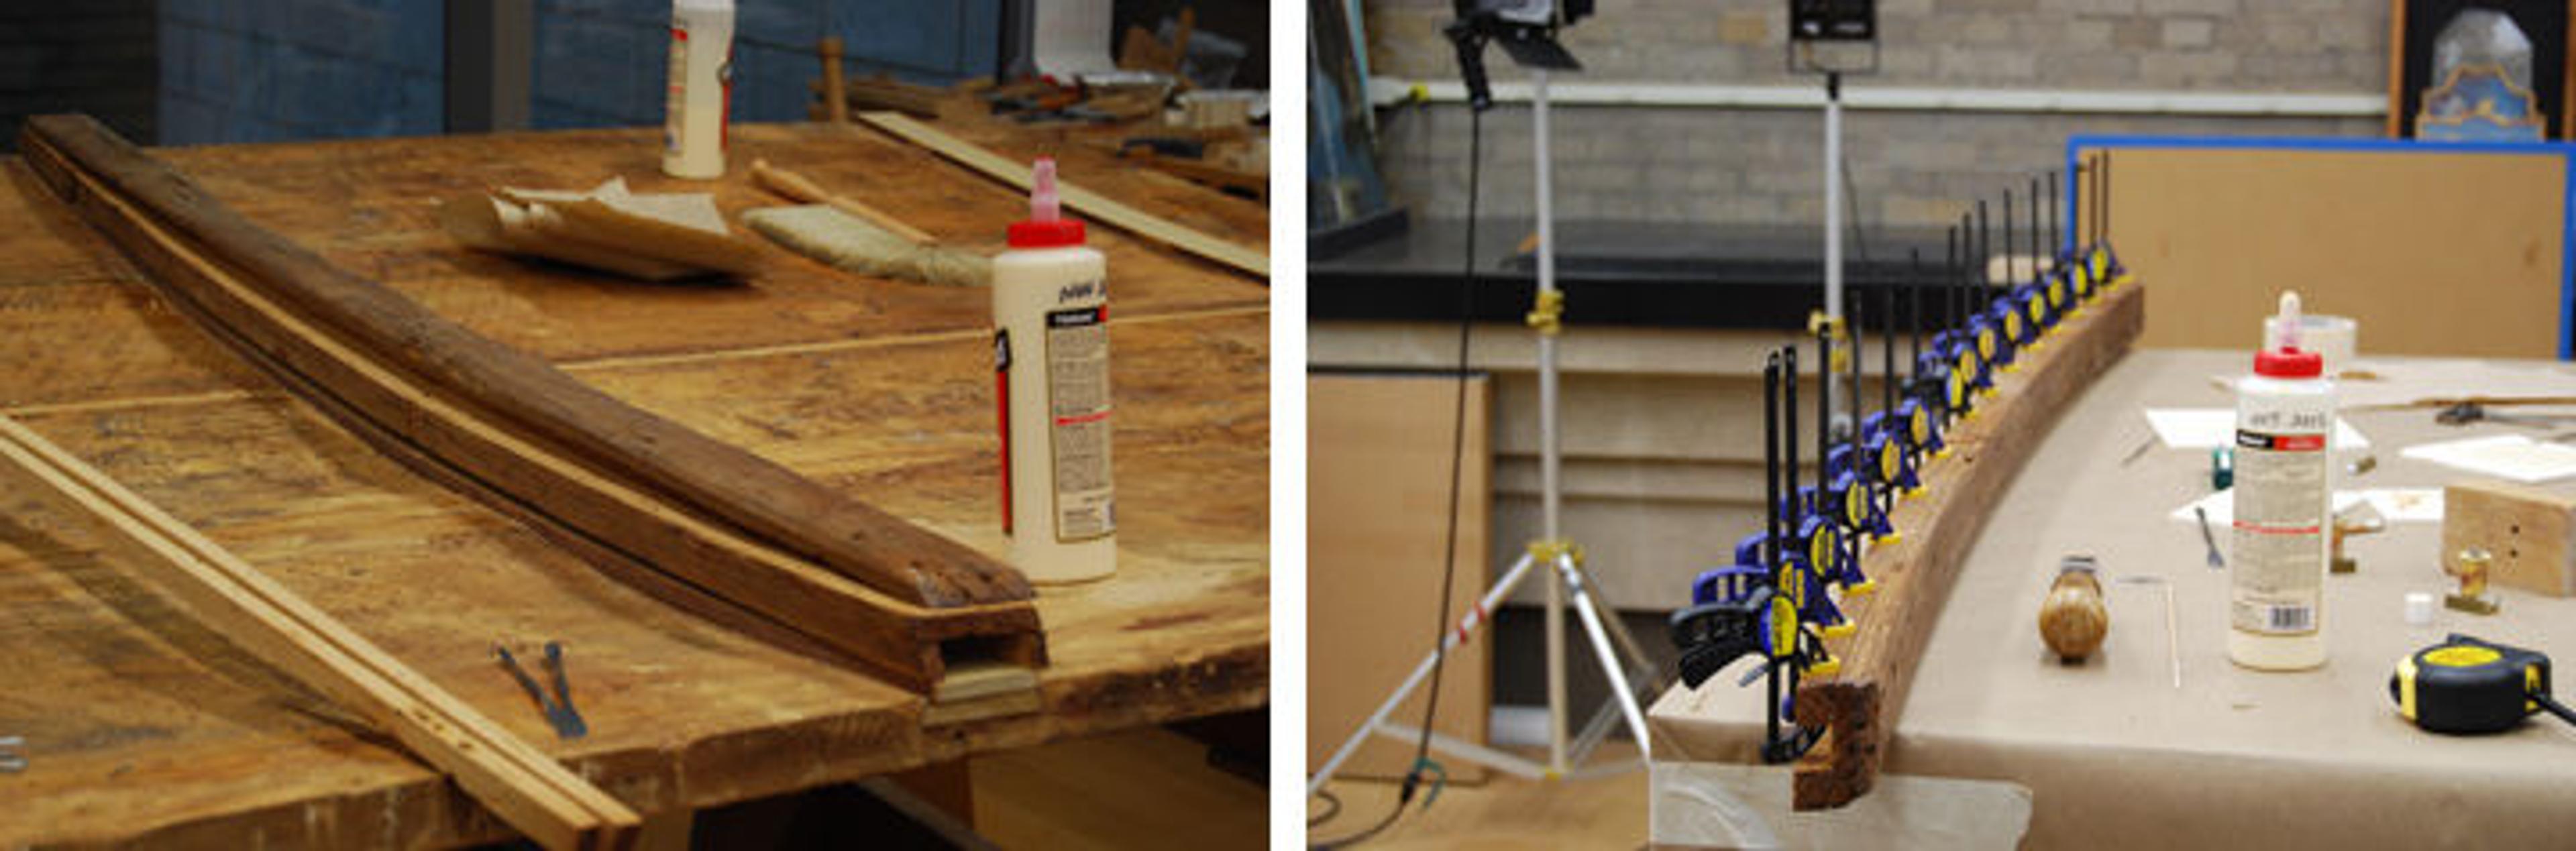
Left: In the process of modifying a cross-piece to give it a new curvature and leaving a hollow chamber to accommodate the spring system. Right: The new curvature of the modified crosspiece, which is shown held with clamps, matches the curvature of the repaired panel. Photos by George Bisacca
Brass "shoes" were attached to the new track build-up. Sliding Delrin (high-density, low-friction thermoplastic) "feet" with threaded posts were inserted into brass shoes. The modified battens were then placed over the tracks, and brass sleeves and springs were inserted into each hole with a nut holding everything in place.
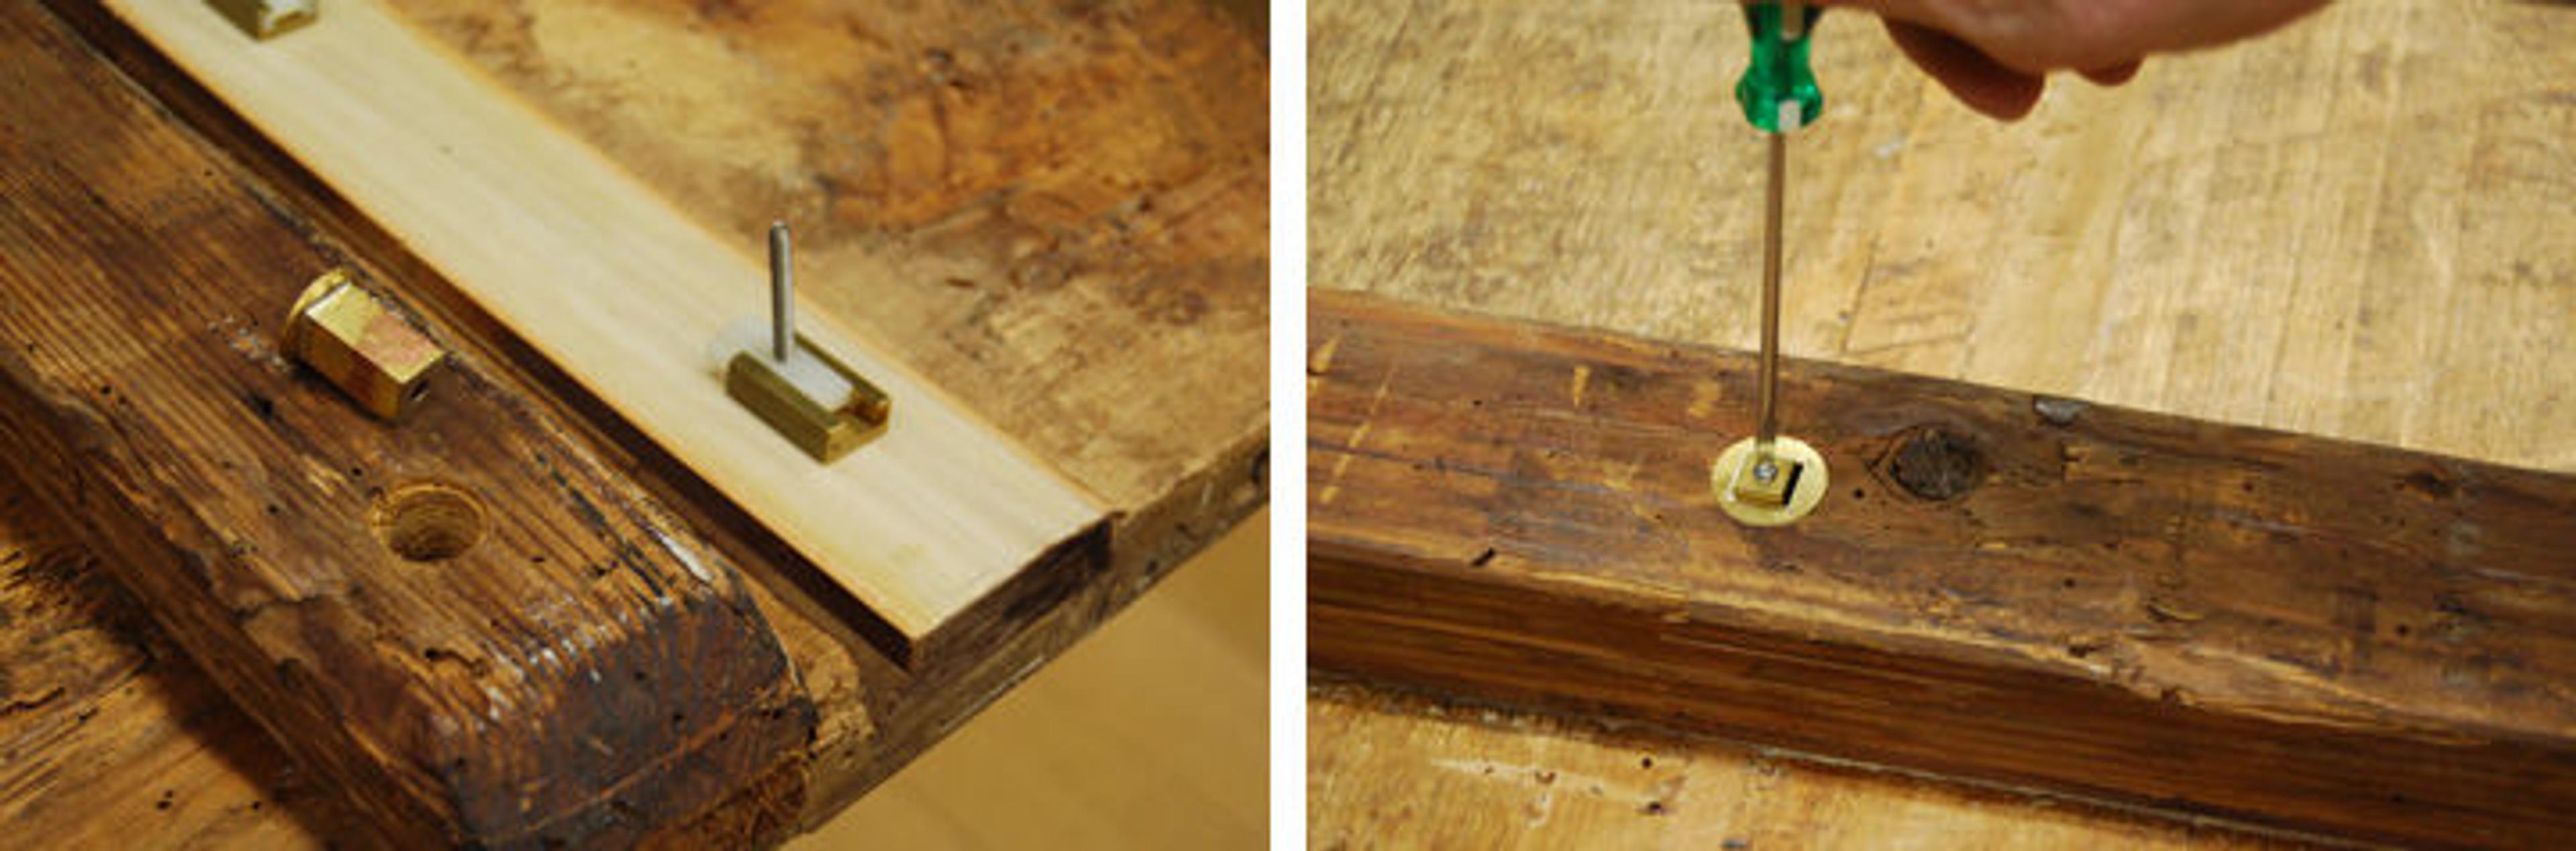
Left: A brass "shoe" with a sliding Delrin "foot" mounted on the crosspiece base. Right: With the cross-piece fit into place, the brass cylinder and spring fit over the brass shoe and sliding Delrin foot, and a nut holds everything into place. Photos by George Bisacca
Each nut could be individually tightened or loosened in order to adjust tension. These mechanisms allow enough movement for the wood panel to naturally expand, contract, and warp in a very controlled way. Our panel was now repaired and fully supported!
In my final post, I'll discuss the final work carried out on the painted surface, the careful considerations of framing a curved panel, and finally seeing the painting hung in the galleries!
Related Link
See all blog posts related to the conservation of Peter Candid's The Annunciation.