Digital Art Copyism: Making Your Own Super Mario Clouds
«In my last Digital Underground post, I discussed artist Cory Arcangel's Super Mario Clouds (2002), a digital artwork that stripped the original Super Mario Bros. video game of everything but the background and clouds. If your interest in digital-art copyism was piqued by that, then you should also know that there are many routes one can take to achieve this end result. Cory has already shared his process, and in this post I will outline my experience translating his image-based instructions. If all goes well, you will end up with your very own bespoke copy of Super Mario Clouds.»
Source the Materials
Tools
EPROM Programmer, UV eraser, soldering iron, desoldering pump/iron/braid, screwdriver
Materials
Nintendo Entertainment System/Famicom, Super Mario Bros. game cartridge, 256KB EPROM (27c256), half-height 28-pin IC socket
This will take a bit more preparation than going to your local art supply store. If you are located in the New York City area and don't mind paying twice the going price, 8 Bit and Up Games and Video Games New York both sell Nintendo Entertainment Systems [NES] and cartridges. If you don't already have an EPROM programmer (and therefore will have to wait anyway), then ordering everything from eBay is definitely the cheaper option. Take extra care in purchasing the original version of Super Mario Bros.—not any of the Super Mario Bros. / Duck Hunt combo games—or you will need to figure out new cloud offsets and will end up achieving a less genuine recreation.
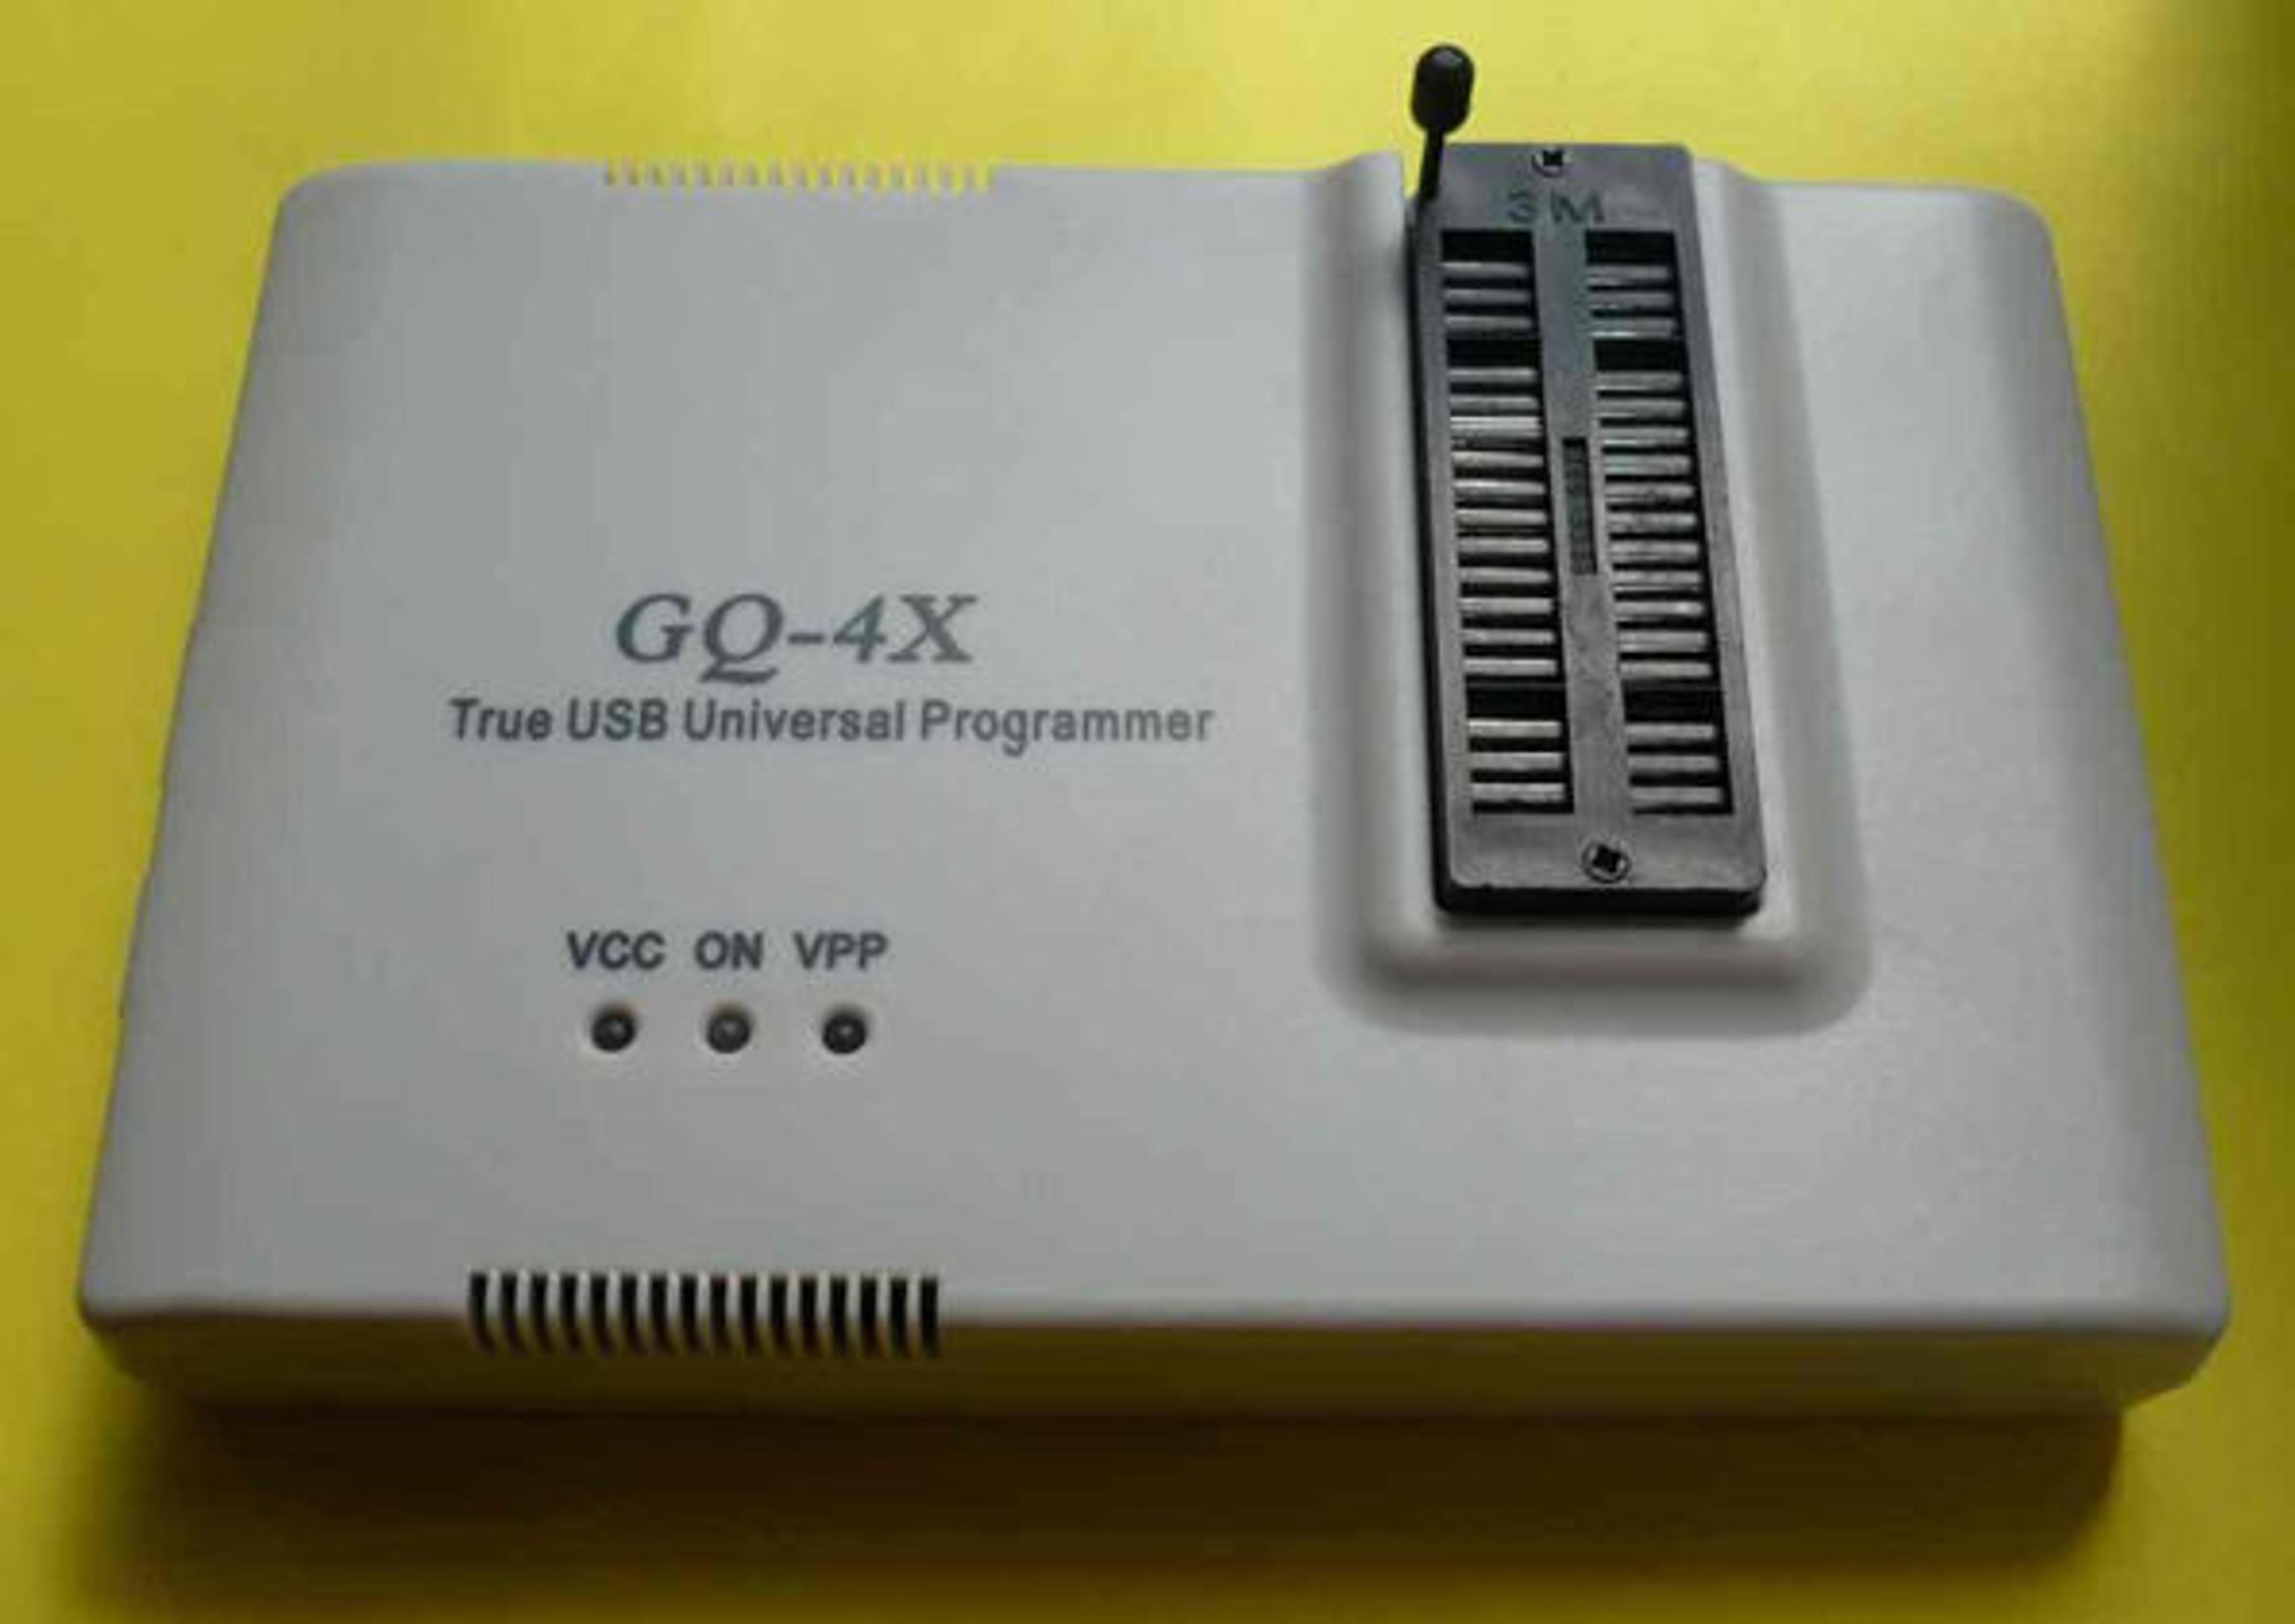
You're not going to find this EPROM programmer at your local RadioShack.
Getting the game system and cartridges was easy. The harder part, for me, was figuring out just what modern-day tools would work best. Cory's work was made over ten years ago, when Windows XP was the operating system of choice, and many desktops and even laptops came with serial ports. It took a lot of asking around, but a bunch of awesome folks on the NESDev and NintendoAge forums were able to show me what programmers would work when replacing the chip in the game cartridge. I settled on the GQ-4x programmer, as it was USB compatible and still supported by the manufacturer. If you happen to a different programmer that works as well, please let me know (comment on this post or reach me on Twitter, @jedahan) and I'll update this post.
The last three things needed were EPROM (Eraseable Programmable Read-Only Memory) chips of the right size and voltage to replace those in the Super Mario Bros. cartridges, sockets to replace the chips when mistakes were made, and a UV eraser for the same reason. All of these components can be found on eBay. These chips are fascinatingly simple: When the 27c256 (28-pin, 256KB memory) chips arrived, they all had a window and you could see each strand of silicon.
In a world full of black boxes, it was exciting to find the memory was visible. This highlighted just how much more accessible computer technology used to be.
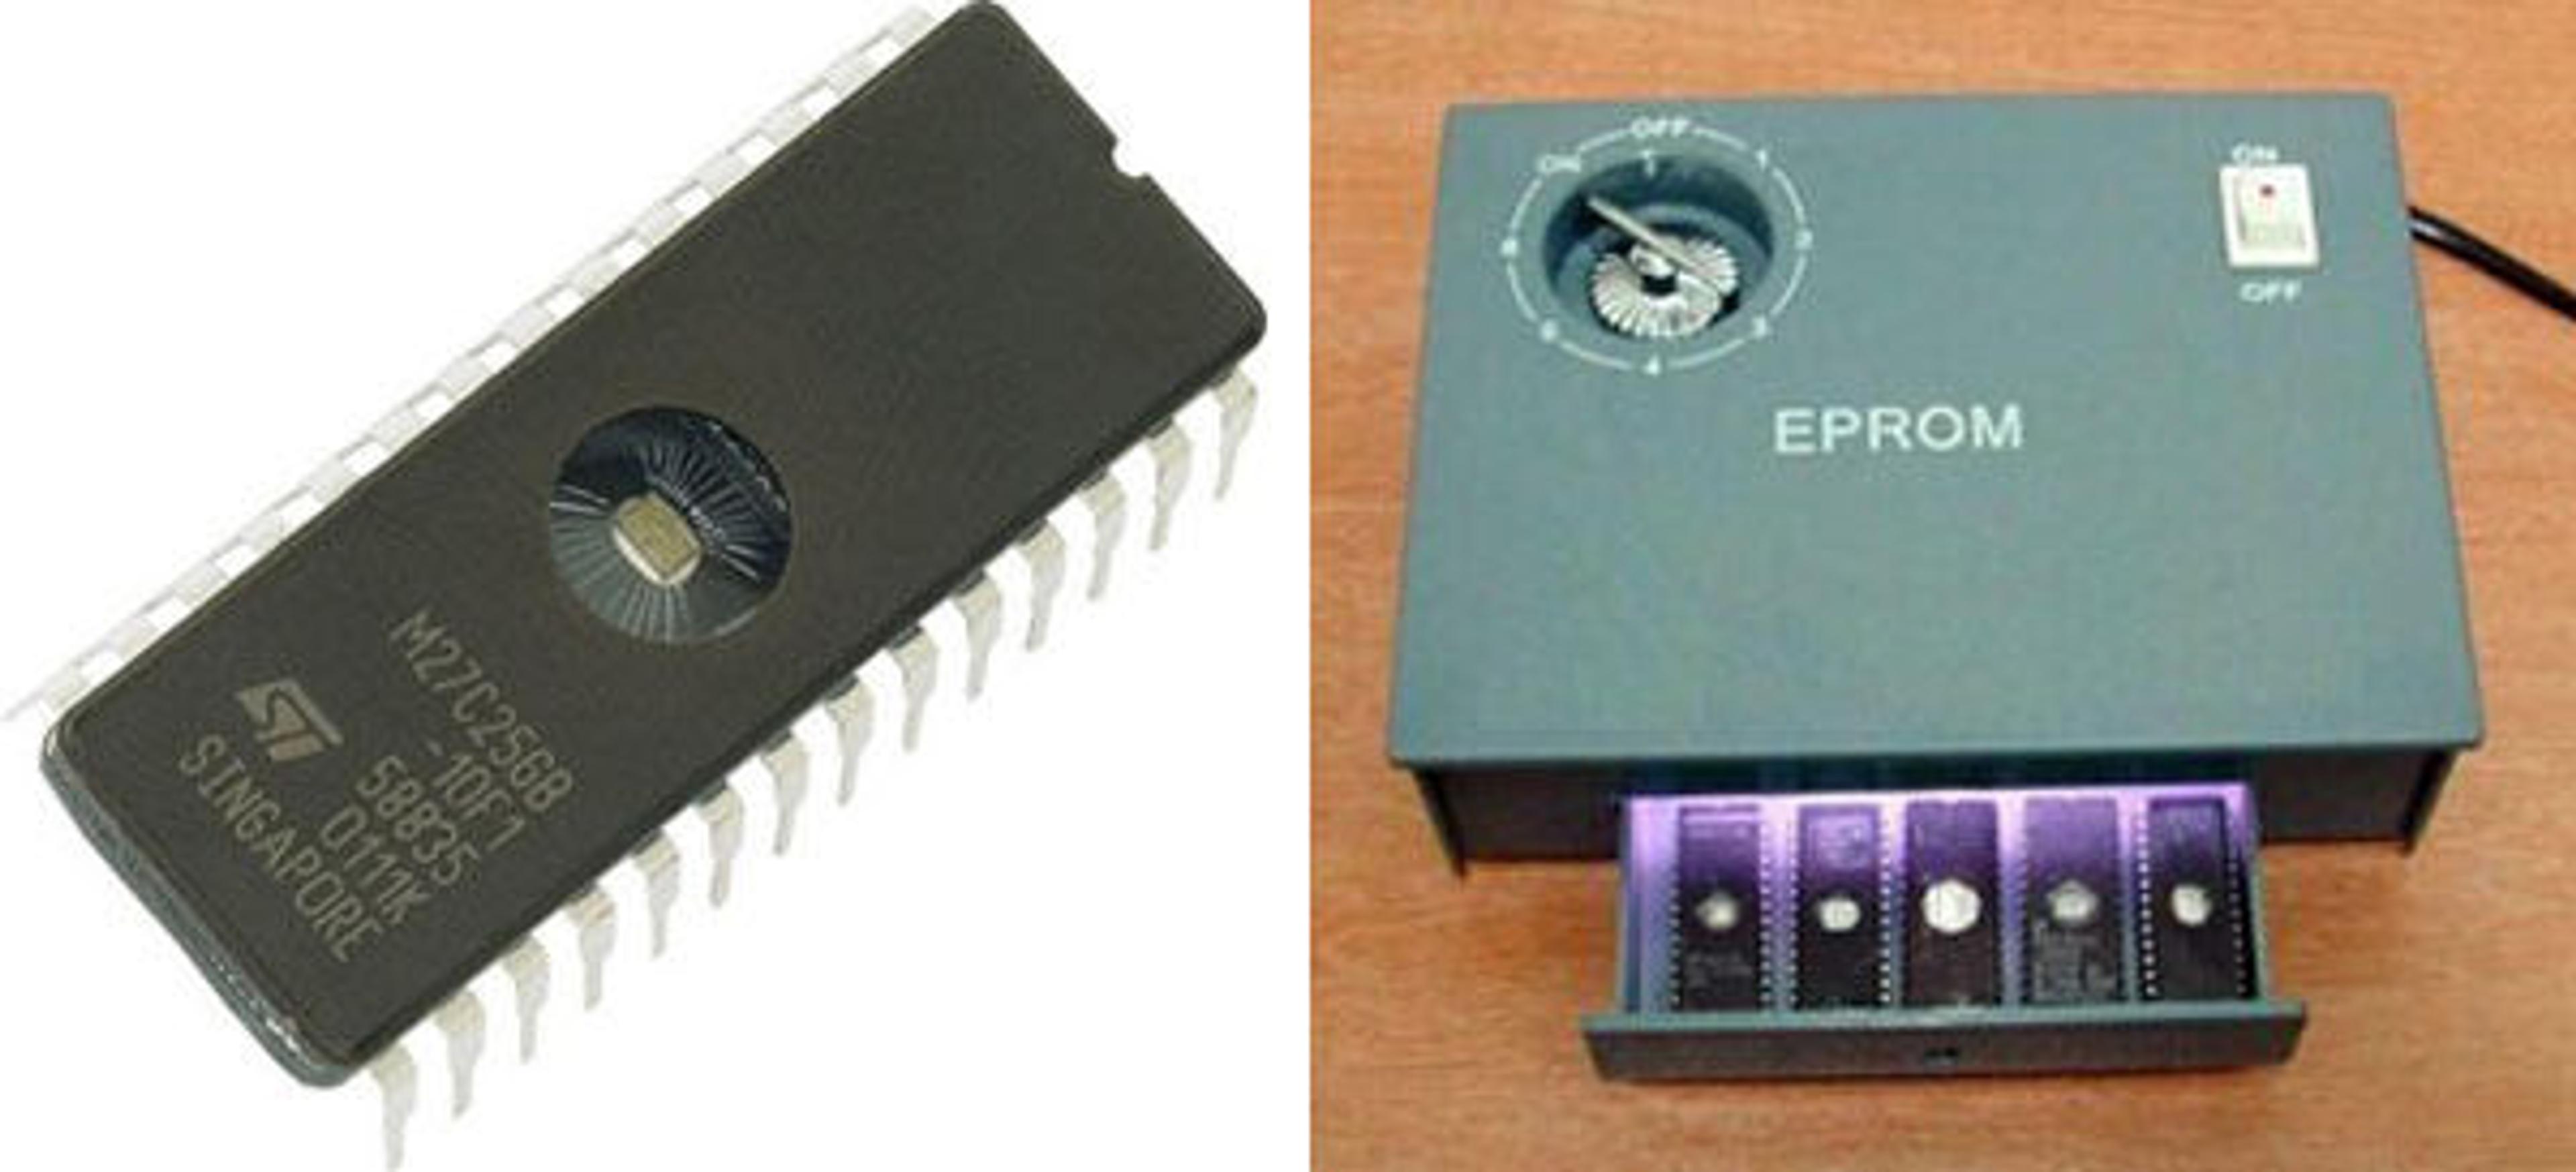
Left: Look, you can see the strands of silicon in the 27c256 chip! This is where the bits are stored. If only modern computers were so simple! Right: UV eraser—a chip-sized tanning bed of sorts.
The way these old chips work is that you write data to them through the pins on the bottom, and to erase them you blast the exposed strands of memory with tons of ultraviolet light. You can either leave them out in the sun for a few hours (or days, in cloudy conditions), or speed up the process with a special tool called a UV eraser. These inexpensive chip "tanning beds" have timers and drawers that close so your skin doesn't accidentally sunburn while erasing the chips.
Another note when sourcing sockets: Make sure to go with the half-height sockets. These are more expensive, but necessary if you want to fit this in any slot-loading NES and stay as true to the original piece as possible.
Setting Up the Software
The GQ-4x software only runs on Windows. If you are on OSX or Linux, you can use Virtualbox to run Windows XP. I made a video outlining how to get Windows in Virtualbox working with the GQ-4x. If you are already using Windows, then keep on reading.
I wasn't quite sure which file to burn on the chip, but that's why I purchased a UV eraser and lots of spare EPROM chips. It was time to make some mistakes and learn new things! The meat of this blog post is in the video below—a step-by-step click-through of burning your first 6502 EPROM. (If you have any questions, post them in the comments or ask via @jedahan.)
Open the GQ-4x burning software and load the .hex file. Click "Write," and if all goes well your screen should read: Device is verified. Once the chip verification passes, you are ready to modify the cartridge.
Hacking the Cartridge
Disassemble the cartridge—there should be two large chips, one small chip, and a resistor. The small chip is a 10GEN lockout chip, which is needed to run any game on an official NES. The two large chips are the actual game, and should be labeled CHR and PRG. CHR is the character data. It contains all the sprites that are used to draw Mario, the Goombas, and what we are ultimately after—the clouds. (Fun fact: The clouds and the bushes use the same sprite, just a different color. Memory was super limited in those days, so artists had to be thrifty with their pixels.) The PRG chip houses all the code, from when to play sound effects to how high Mario jumps. This is what Cory had rewritten and I programmed onto a chip.
Tip: If you have never soldered before, I suggest the Soldering Is Easy comic book and the wide array of YouTube tutorials.
Now that we know the lay of the land, it's time to dive right in. Desolder the PRG chip; I've found a desoldering iron easier to use than the desoldering braid. Whichever you use, be patient and pull back if you see burn marks or black smoke. If the tracings peel off the board, your new chip won't connect properly. Once the desoldering is done, solder on the socket.
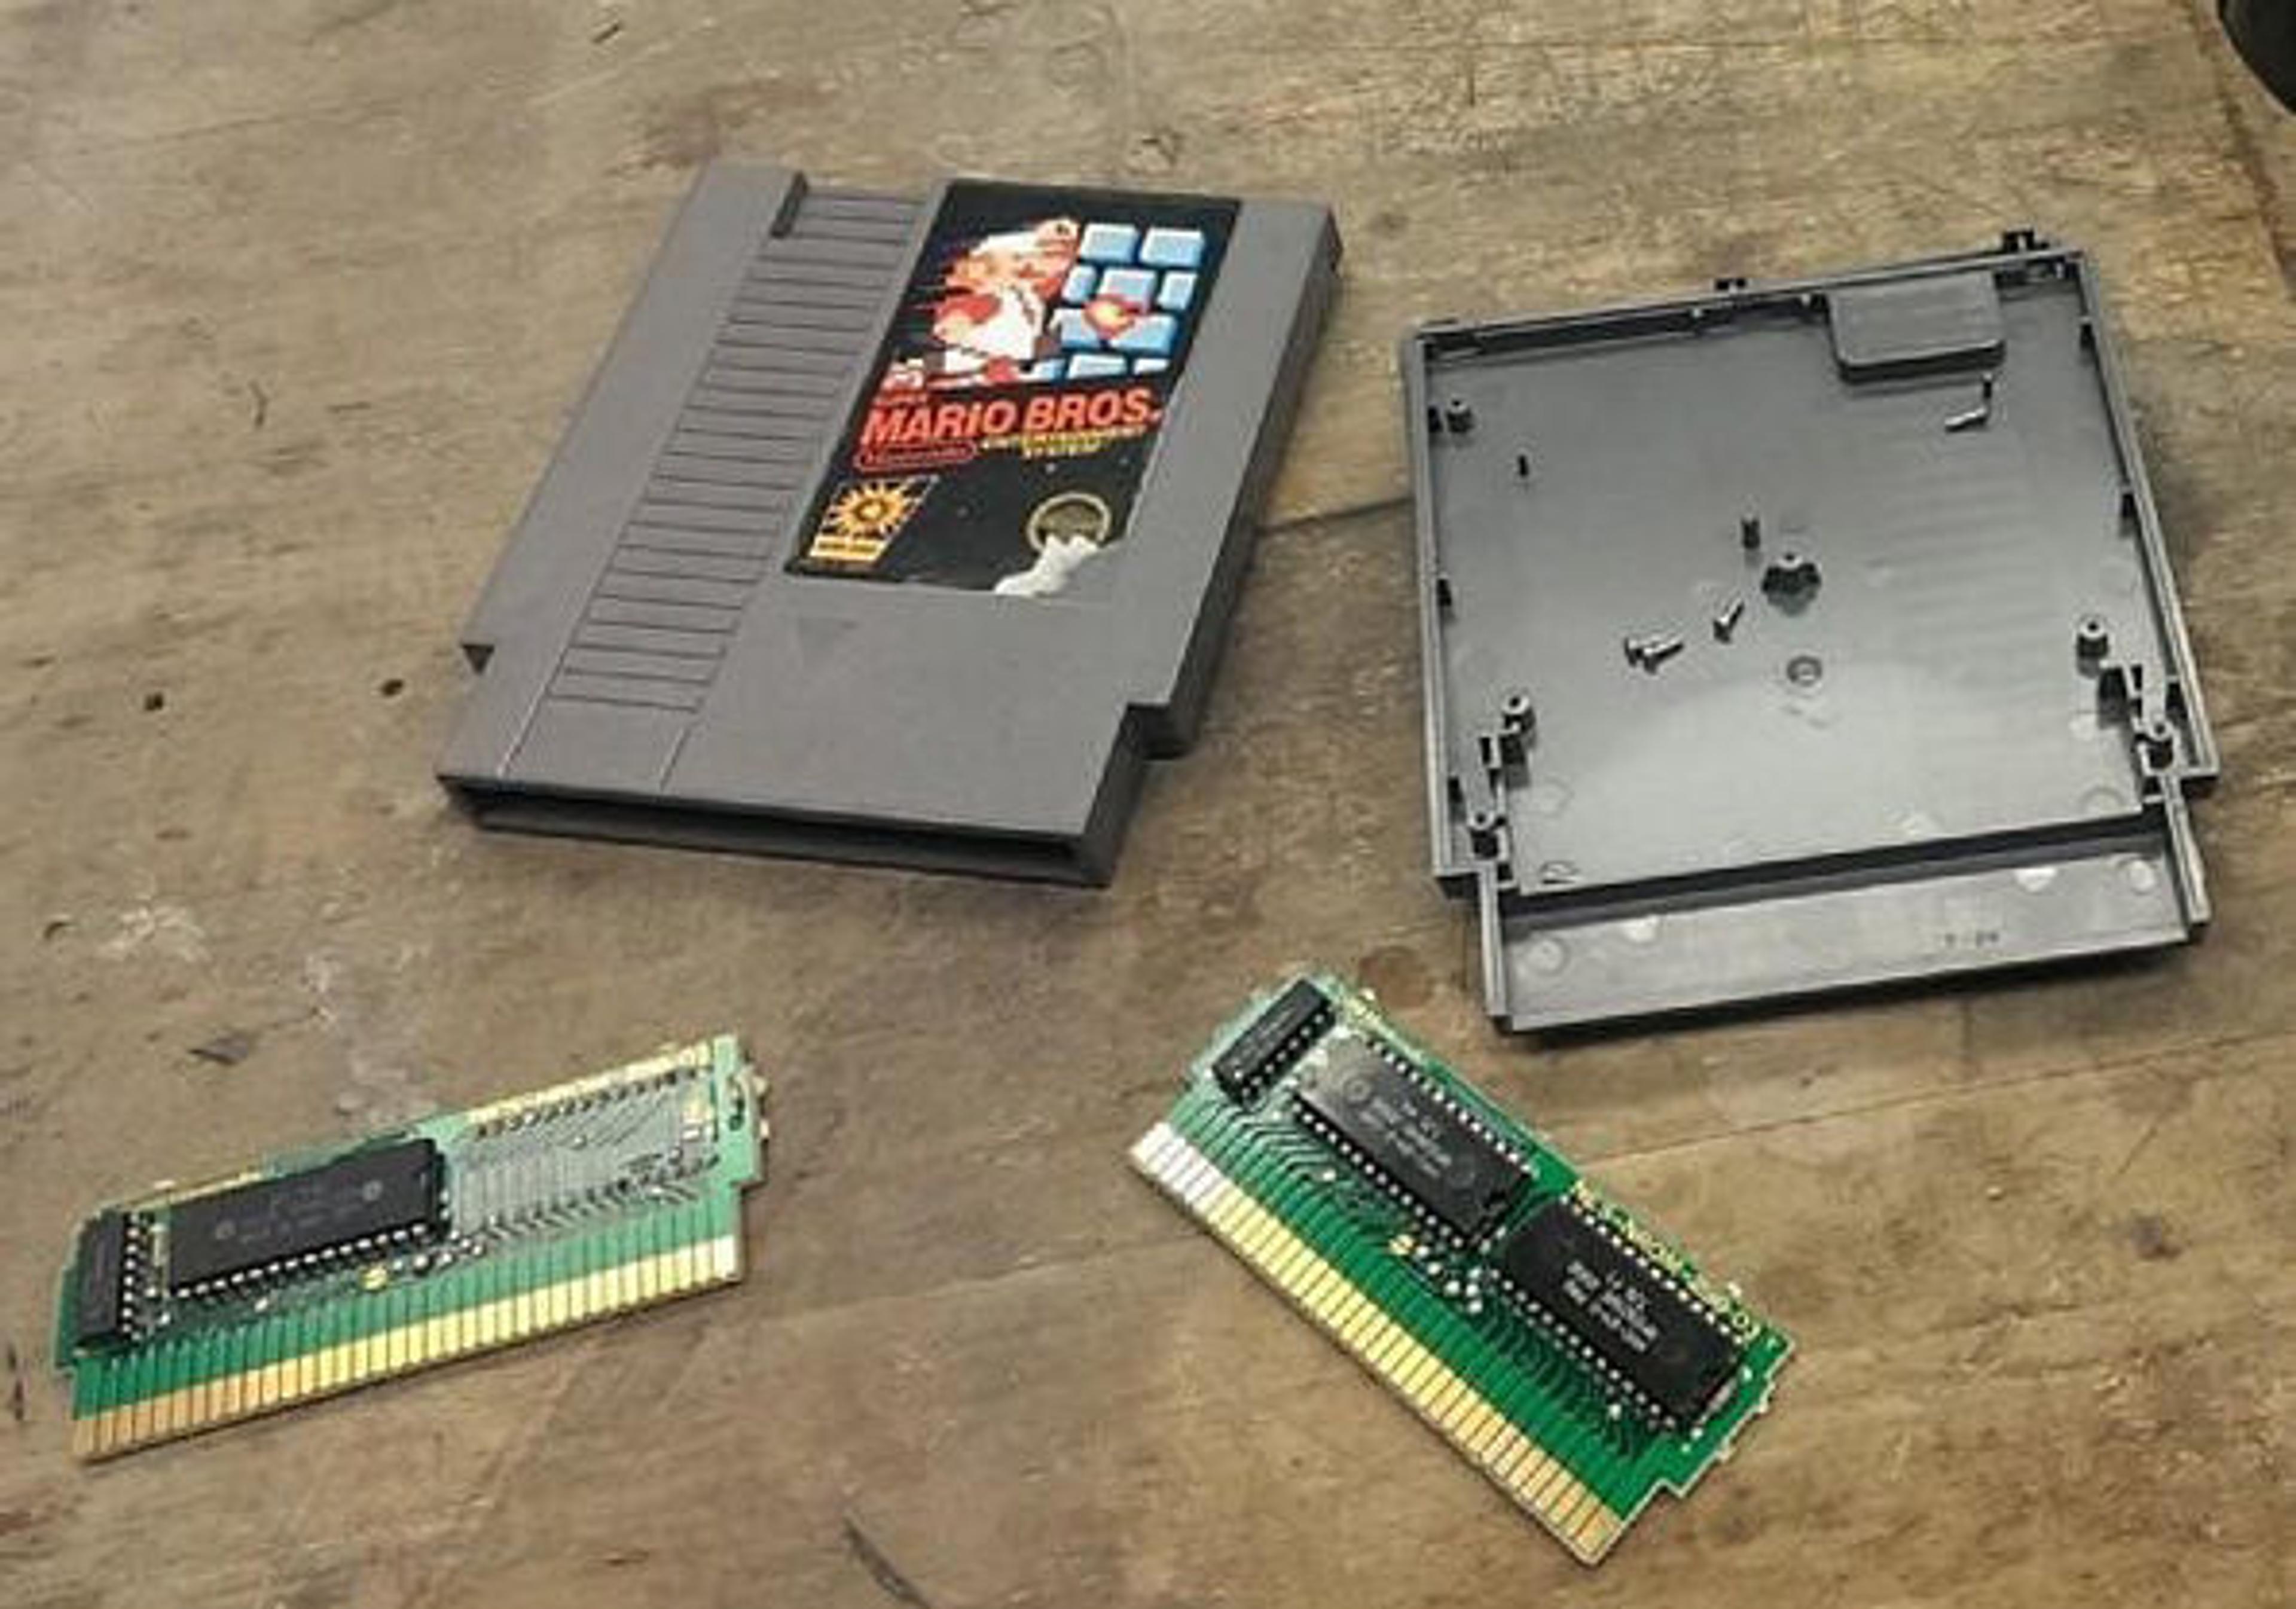
Left: Board with both chips in; Right: Board with one chip desoldered and out
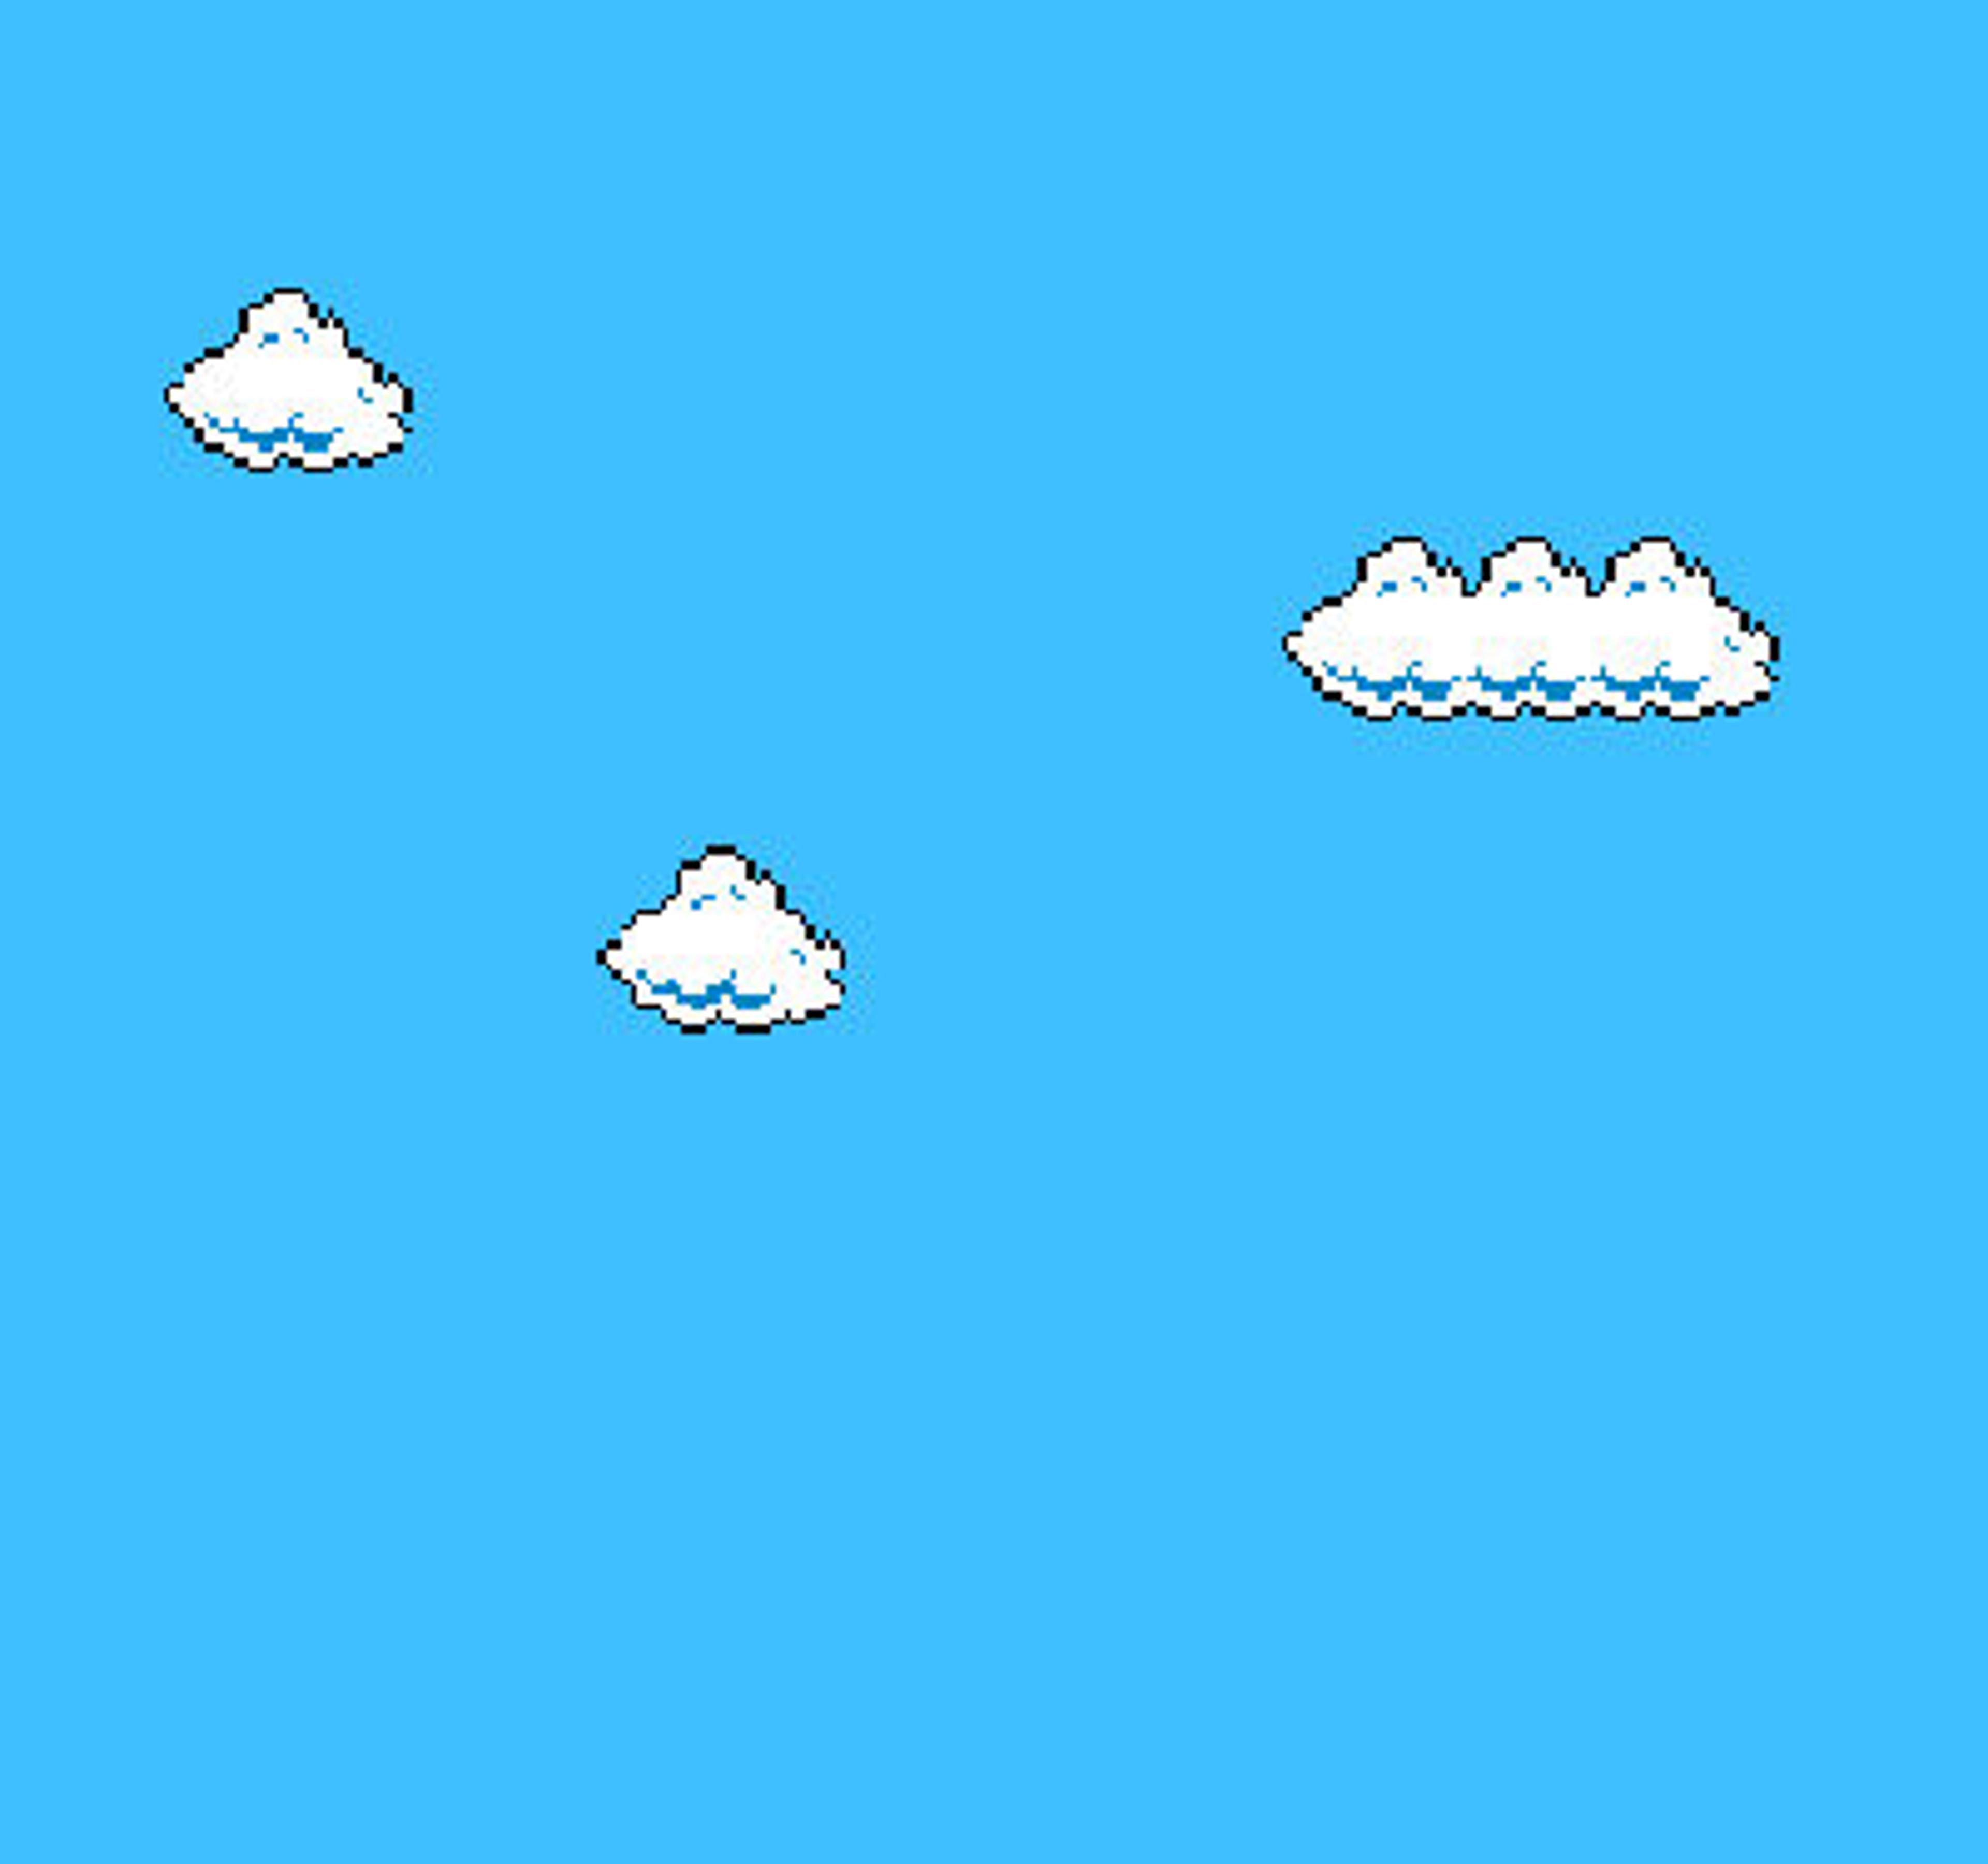
Pop in the cartridge and, fingers crossed, you too can enter a Zen-like state, watching the clouds pass by:
If this doesn't work, don't worry! Try erasing the chip in the UV eraser for five minutes and burning a different file from the zip archive. Download the archive once again, and make sure your solder joints look good (see the Soldering Is Easy booklet again)! Tweet or comment here if you have trouble, and I will help!
Re-making the Art
So now that you have a working cartridge, but you aren't done yet. You need to open up a hole in the top of the case to fit the new socket and PRG combo, and cover the window so that the sun or other light doesn't erase the chip. Cory did this with a piece of masking tape, and if you are trying to be as original as possible, then do the same.
Copying Super Mario Clouds was interesting. While modifying the cartridge, I found myself trying to make the cuts look close to the original. It was fun to try and emulate Cory's writing style on the label, which looked more like CLOUDP than CLOUDS. It got me thinking about where the art lives: Is it the projection, the cartridge, the code, the concept, or somewhere else? In the gallery where I originally saw the work, the cartridge itself was hidden from view, but for some reason I wanted my copy to be indistinguishable from the original.
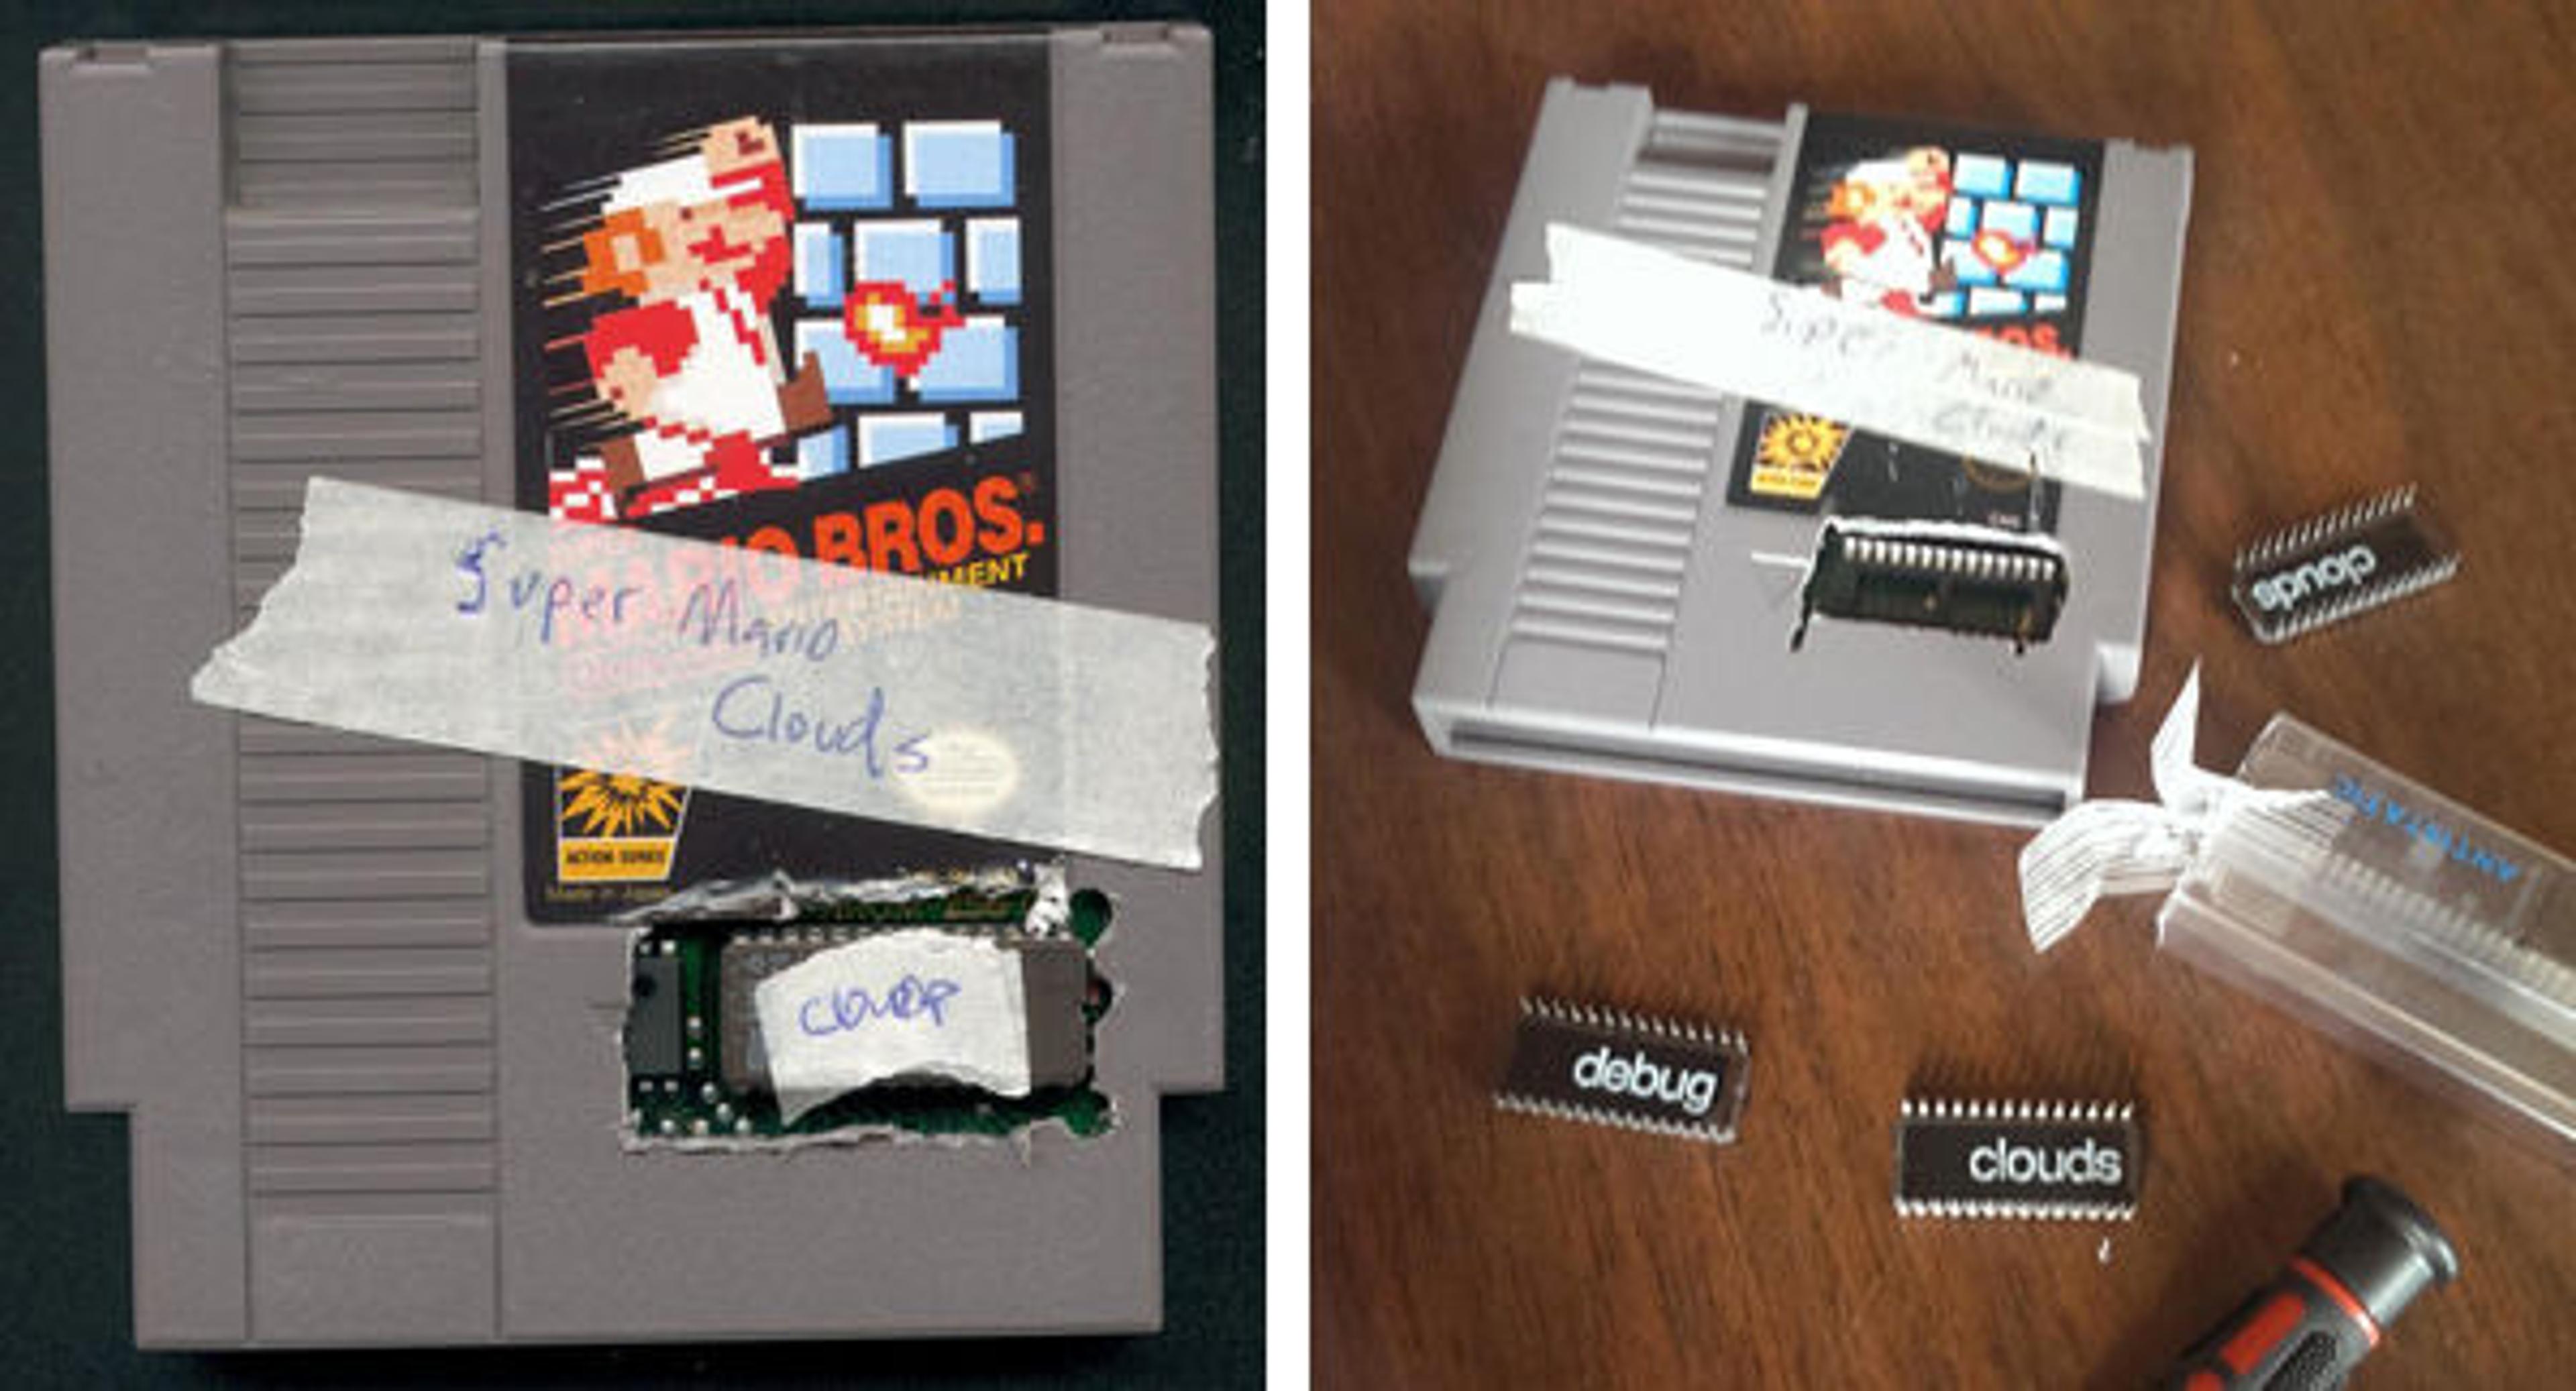
Left: Cory Arcangel's Super Mario Clouds cartridge. Right: my copy (it needed a bit more work)
Cory recently came to the Met for a completely unrelated event, and I got to talk a bit of shop with him about the project. It turns out the original piece had a bug, and the version I downloaded from Cory's site has the bug fixed. So the edition (of five) that is on tour actually has the wrong sprite in it. If you want to really be indistinguishable, make sure to use the old code! One of the lovely, unique features of code is that it is, in fact, a living medium.
So I have three questions for you, dear reader, and would greatly appreciate answers to any of them: What did you learn today? What needs clarification? What piece of art/code would you like the Met's Media Lab to re-create next? Please follow up with us in the comments section below!
Jonathan Dahan
Jonathan Dahan was formerly a media technology developer in the Digital Media Department.